
Category: Tutorials
PBUSARDO/TASTEYOURJUICE CONTEST RULES
Here’s a written version of the contest rules.
- Contests are contained within the video reviews. Currently running contests also appear in the upper right corner of TasteYourJuice.com, next to “Recent News”
- Contest entries should be emailed to contest@tasteyourjuice.com unless specified otherwise.
- The answer to the contest question must be contained in the subject line of the email. Nothing in the body of the email will be read.
- You must be 18+ to enter a contest.
- You must enter each contest only once. Duplicates from the same email will be removed.
- Contest winners are announced in post contest review videos.
- Contest winners have one week to respond using the same email used when entering the contest to pbusardo@tasteyourjuice.com. No response within one week forfeits your winnings and the prize will be used in a future contest. Sorry, tired of chasing you down.
- I will not respond to emails regarding contests; asking me who won, questions about the contest, if your email made it into the contest, etc. If you did things correctly, you’re entered. Note that the scroll I sometimes show in the video when picking the winner skips over MANY names and your name may not show up, even though you’re entered.
- Contest winners will be required to agree to the following:
- I am at least 18 years old.
- I will use any product won in PBusardo/TasteYourJuice contest at my own risk.
- PBusardo, Phil Busardo, or TasteYourJuice.com will not be held responsible for any damage to person or property from the use of any item won in a contest.
- PBusardo, Phil Busardo, or TasteYourJuice.com will not be responsible for repairing or replacing any item won in a contest in the event it malfunctions or arrives in a non-working state.
- Shipping outside of the US will be paid for by the contest winner.
- You will supply a photo of you with your winnings that can be used on the website.
- You understand that some items may have been opened or used. Nothing is delivered in an unsanitary state.
- You understand that some e-liquids won in a contest may have been previously opened and tested.
- You understand that e-liquids could be poisonous if used incorrectly and MUST be kept out of reach of children and pets.

AIR AND THE ASPIRE
A PBusardo Video – Let’s Talk About Air & The Aspire Some More
In this video we talk about airflow and the potential effect it has with some of your devices… and a little more about the Aspire.
The Links:
ELCigArt
Vermillion River E- Juice
The Video:
SO I WAS PLAYING WITH MY COIL TONIGHT (MICRO-COILING THE RUSSIAN)…
How is that different from every other night? HA!
First, sorry I can’t get the winners tonight, both for the MVP and the 30,000 scubscriber contest. The winners will have to wait for when I get back from ECC, but I think we already know won the 30K Contest!
So anyhow, I worked on a new coil tonight in prepping for CA.
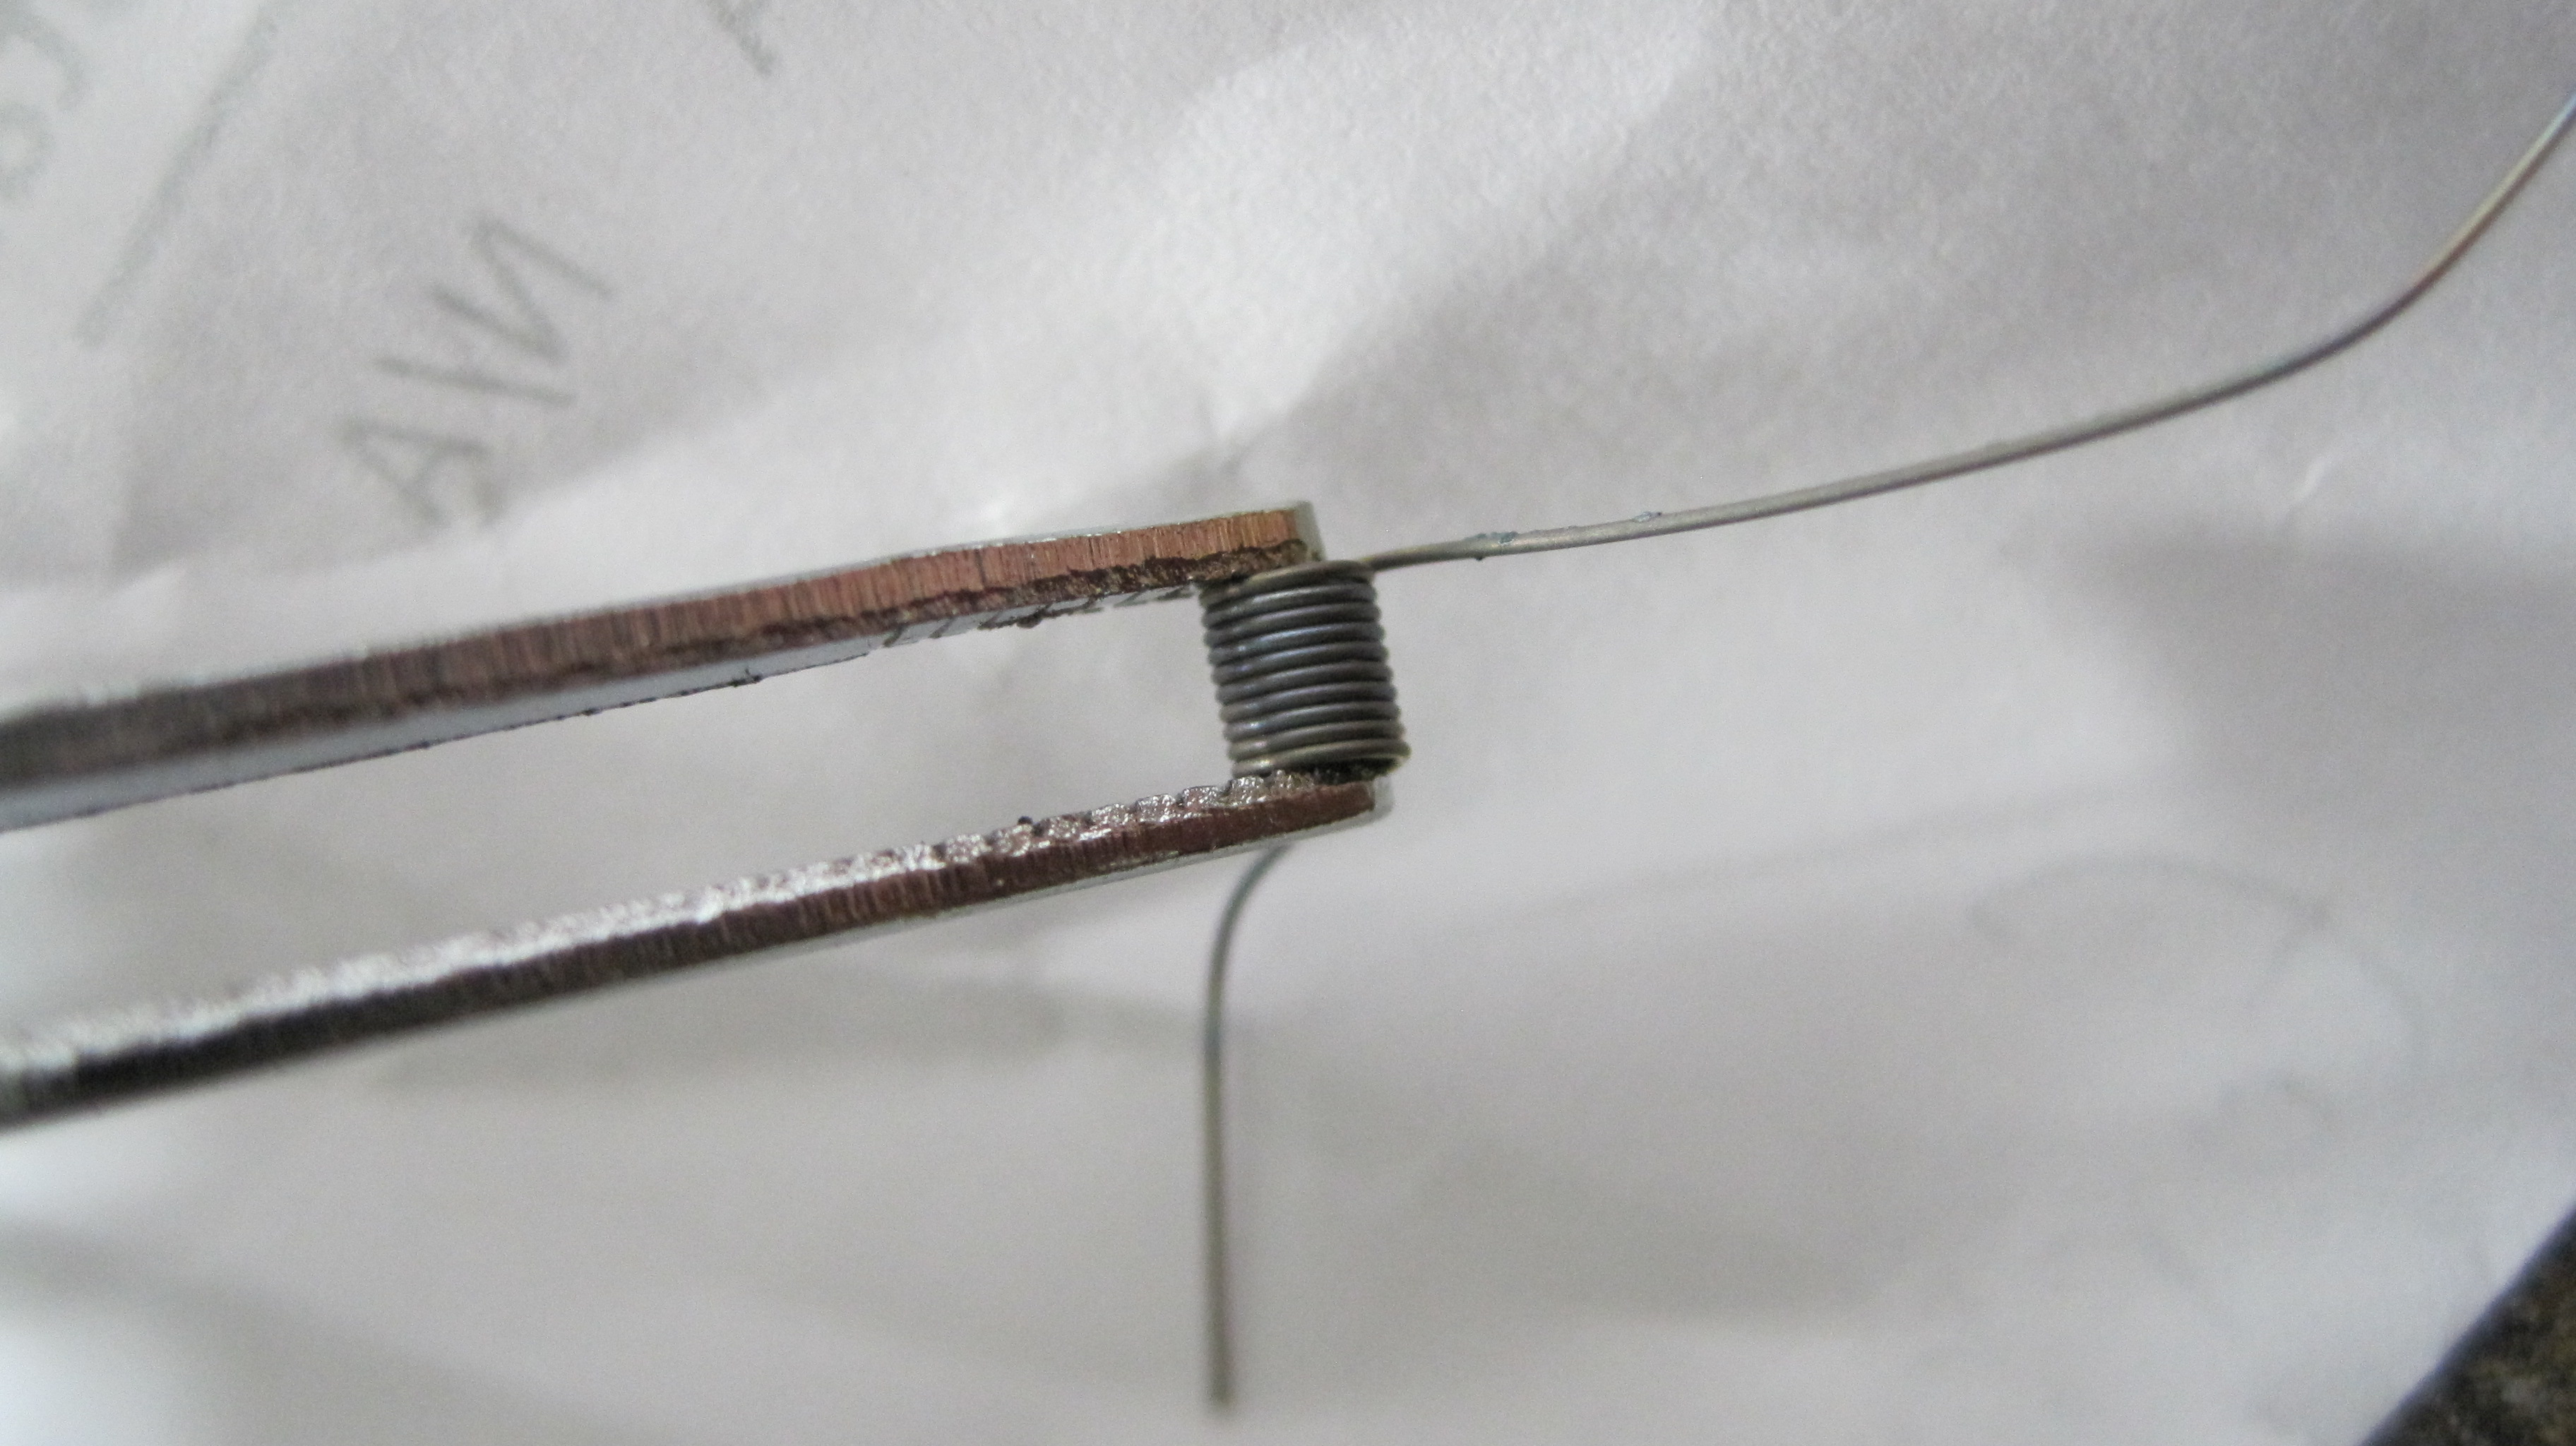
This time I built myself a proper Micro Coil 🙂 I used 10 wraps of 28 gauge Kanthal wrapped on a 2.25mm drill bit:
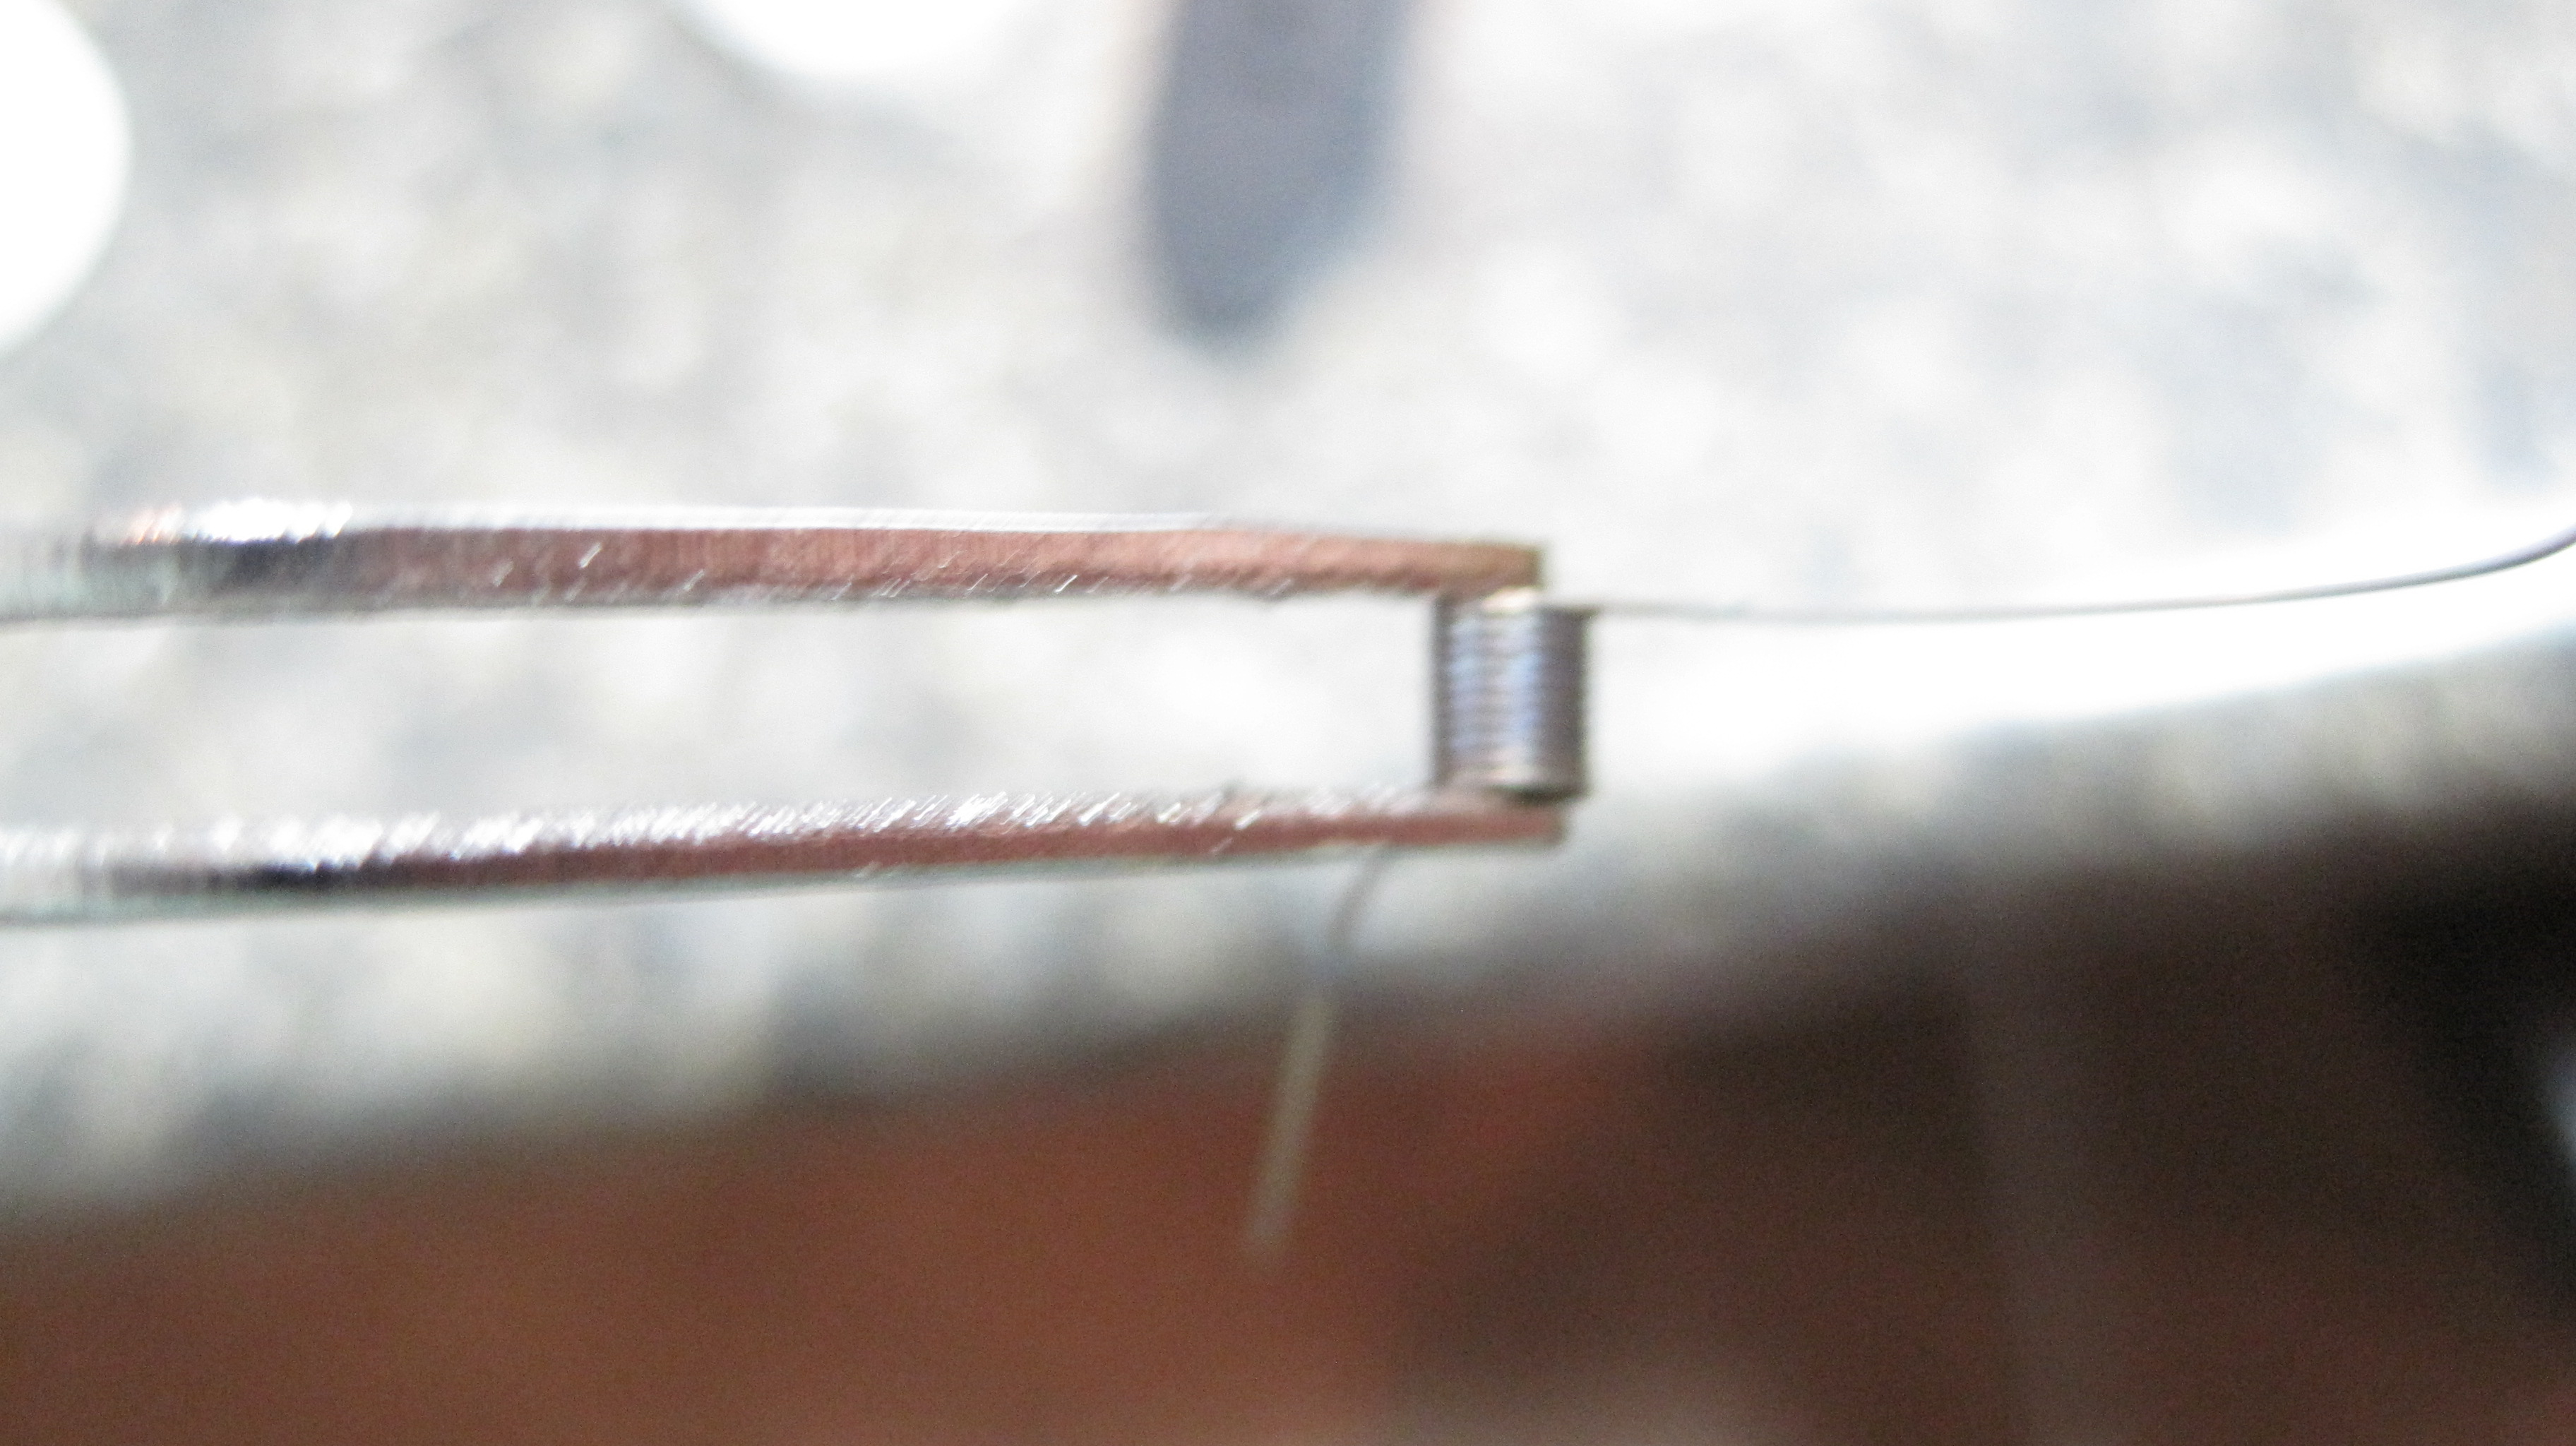
I did the missing step in my video which is the squish and burn. This step tightens up the coil and helps it hold it’s shape:
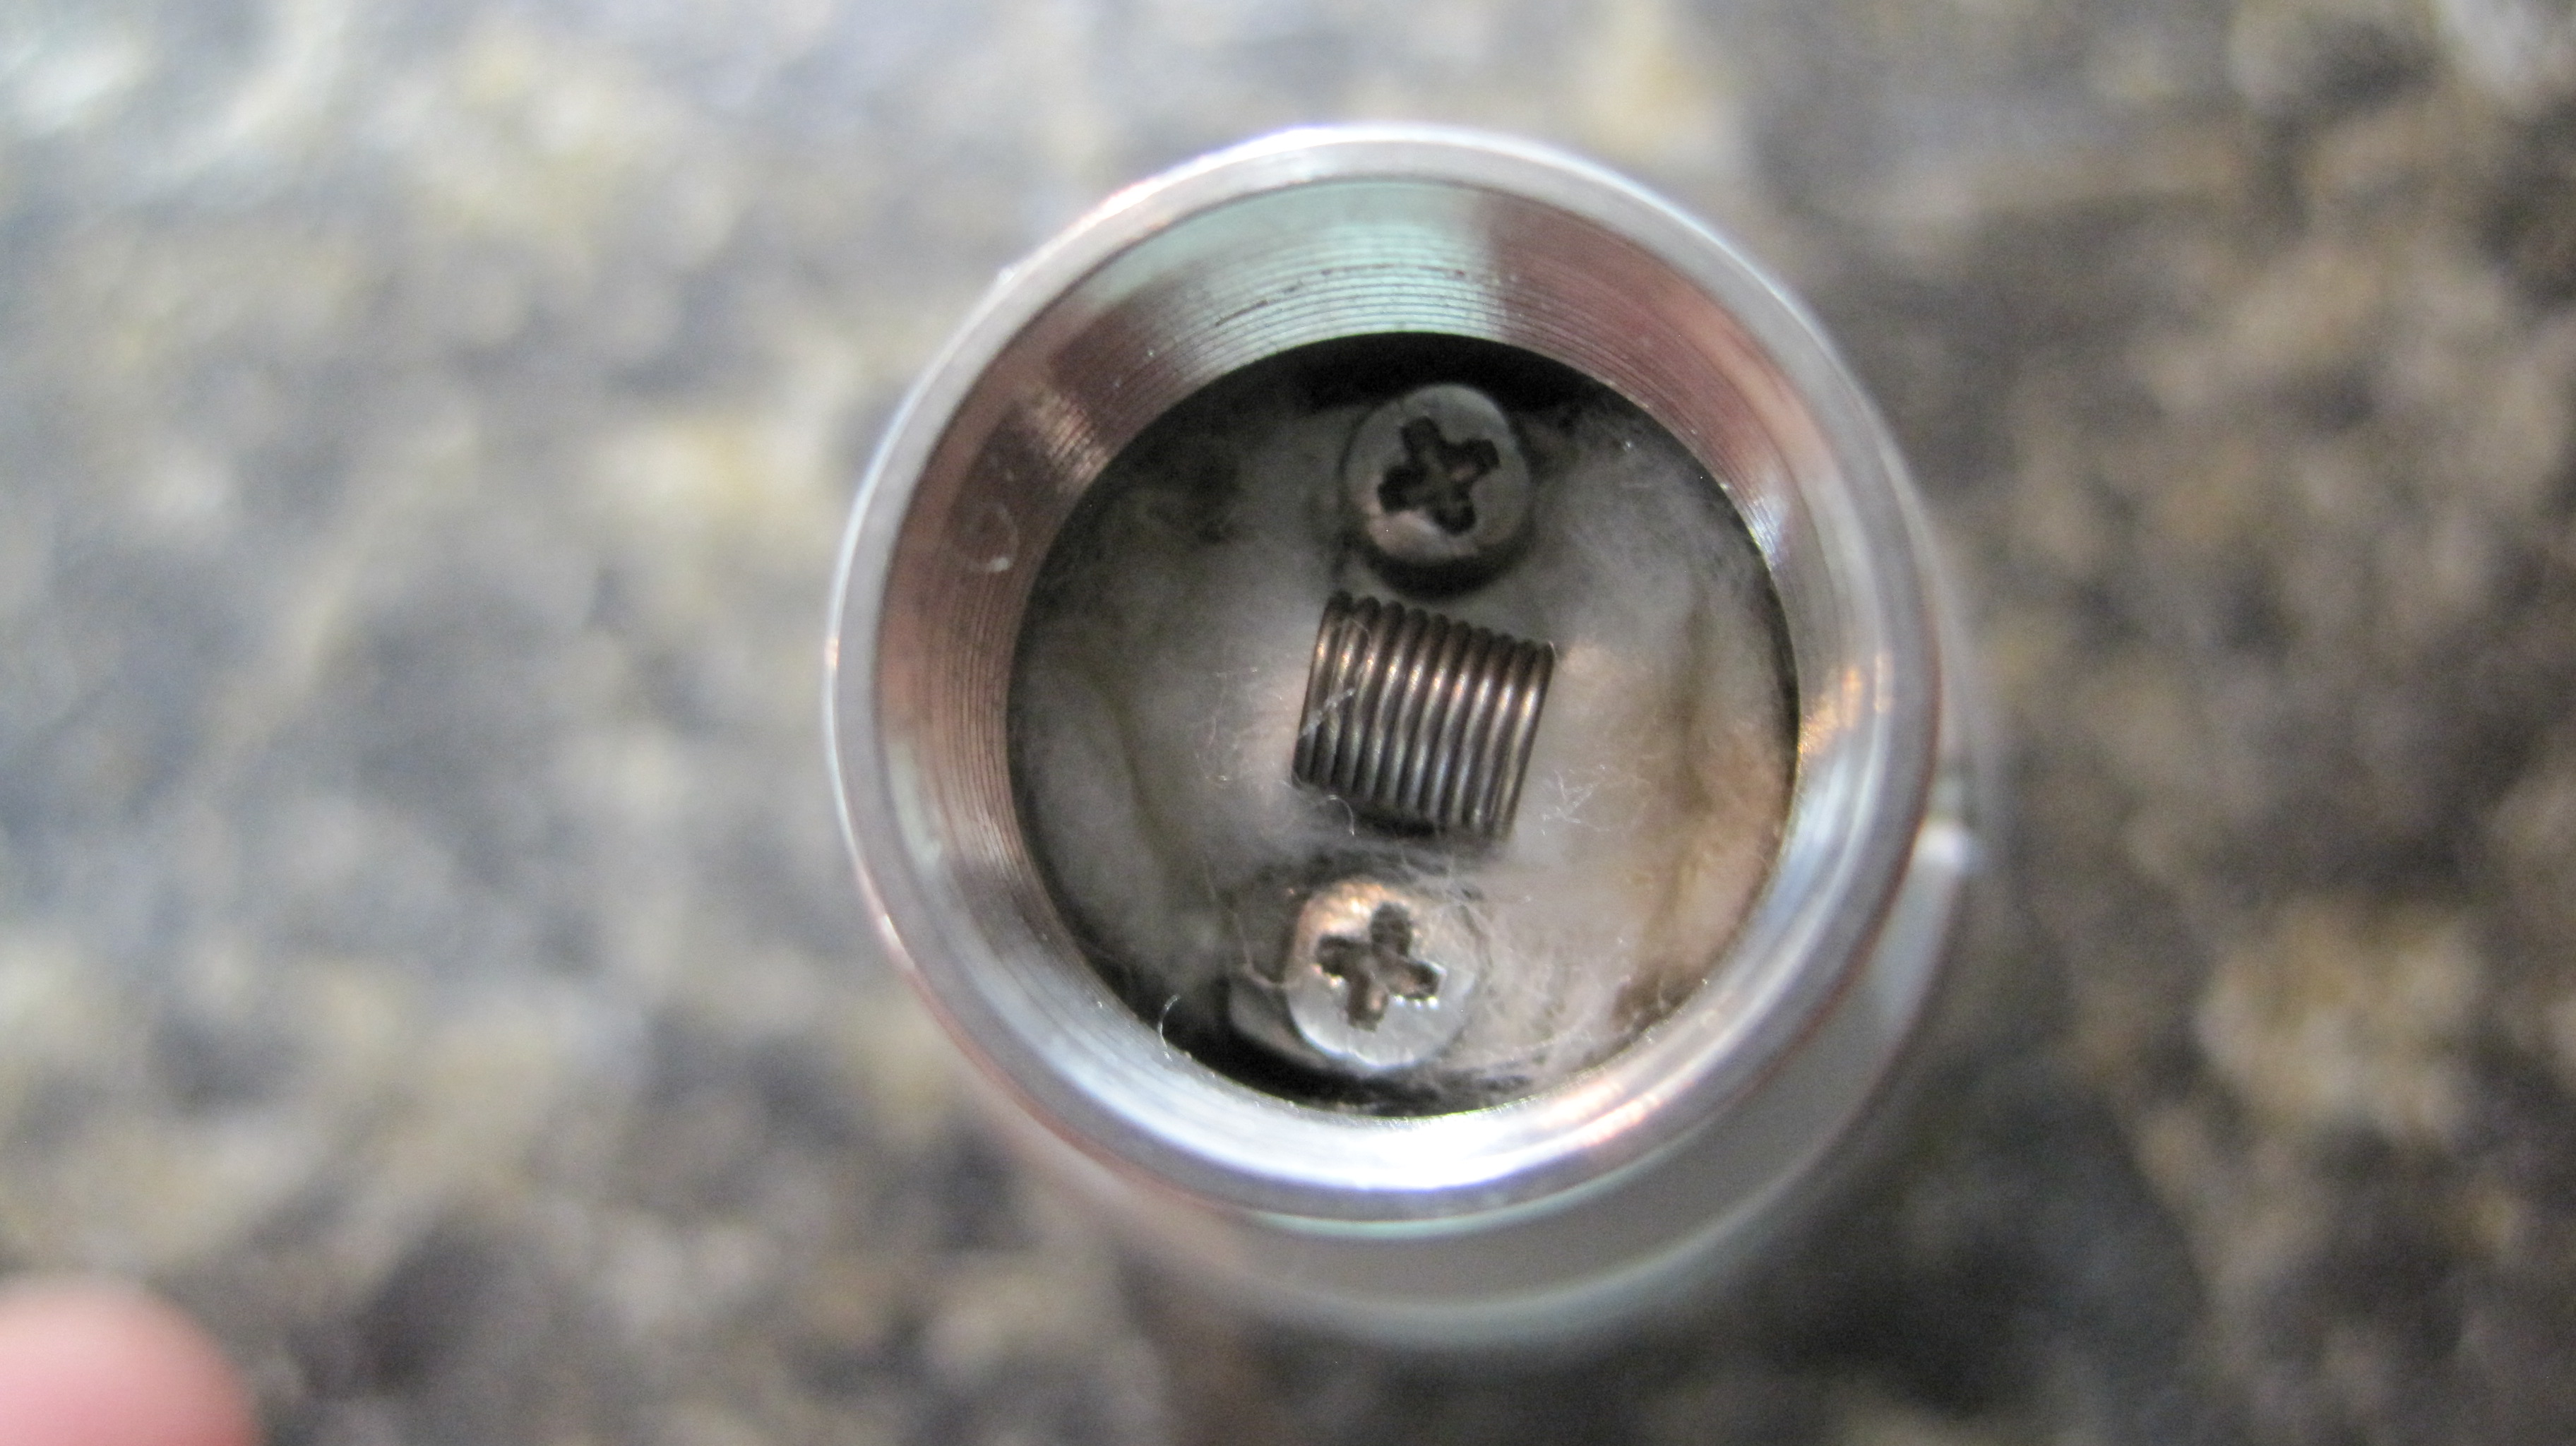
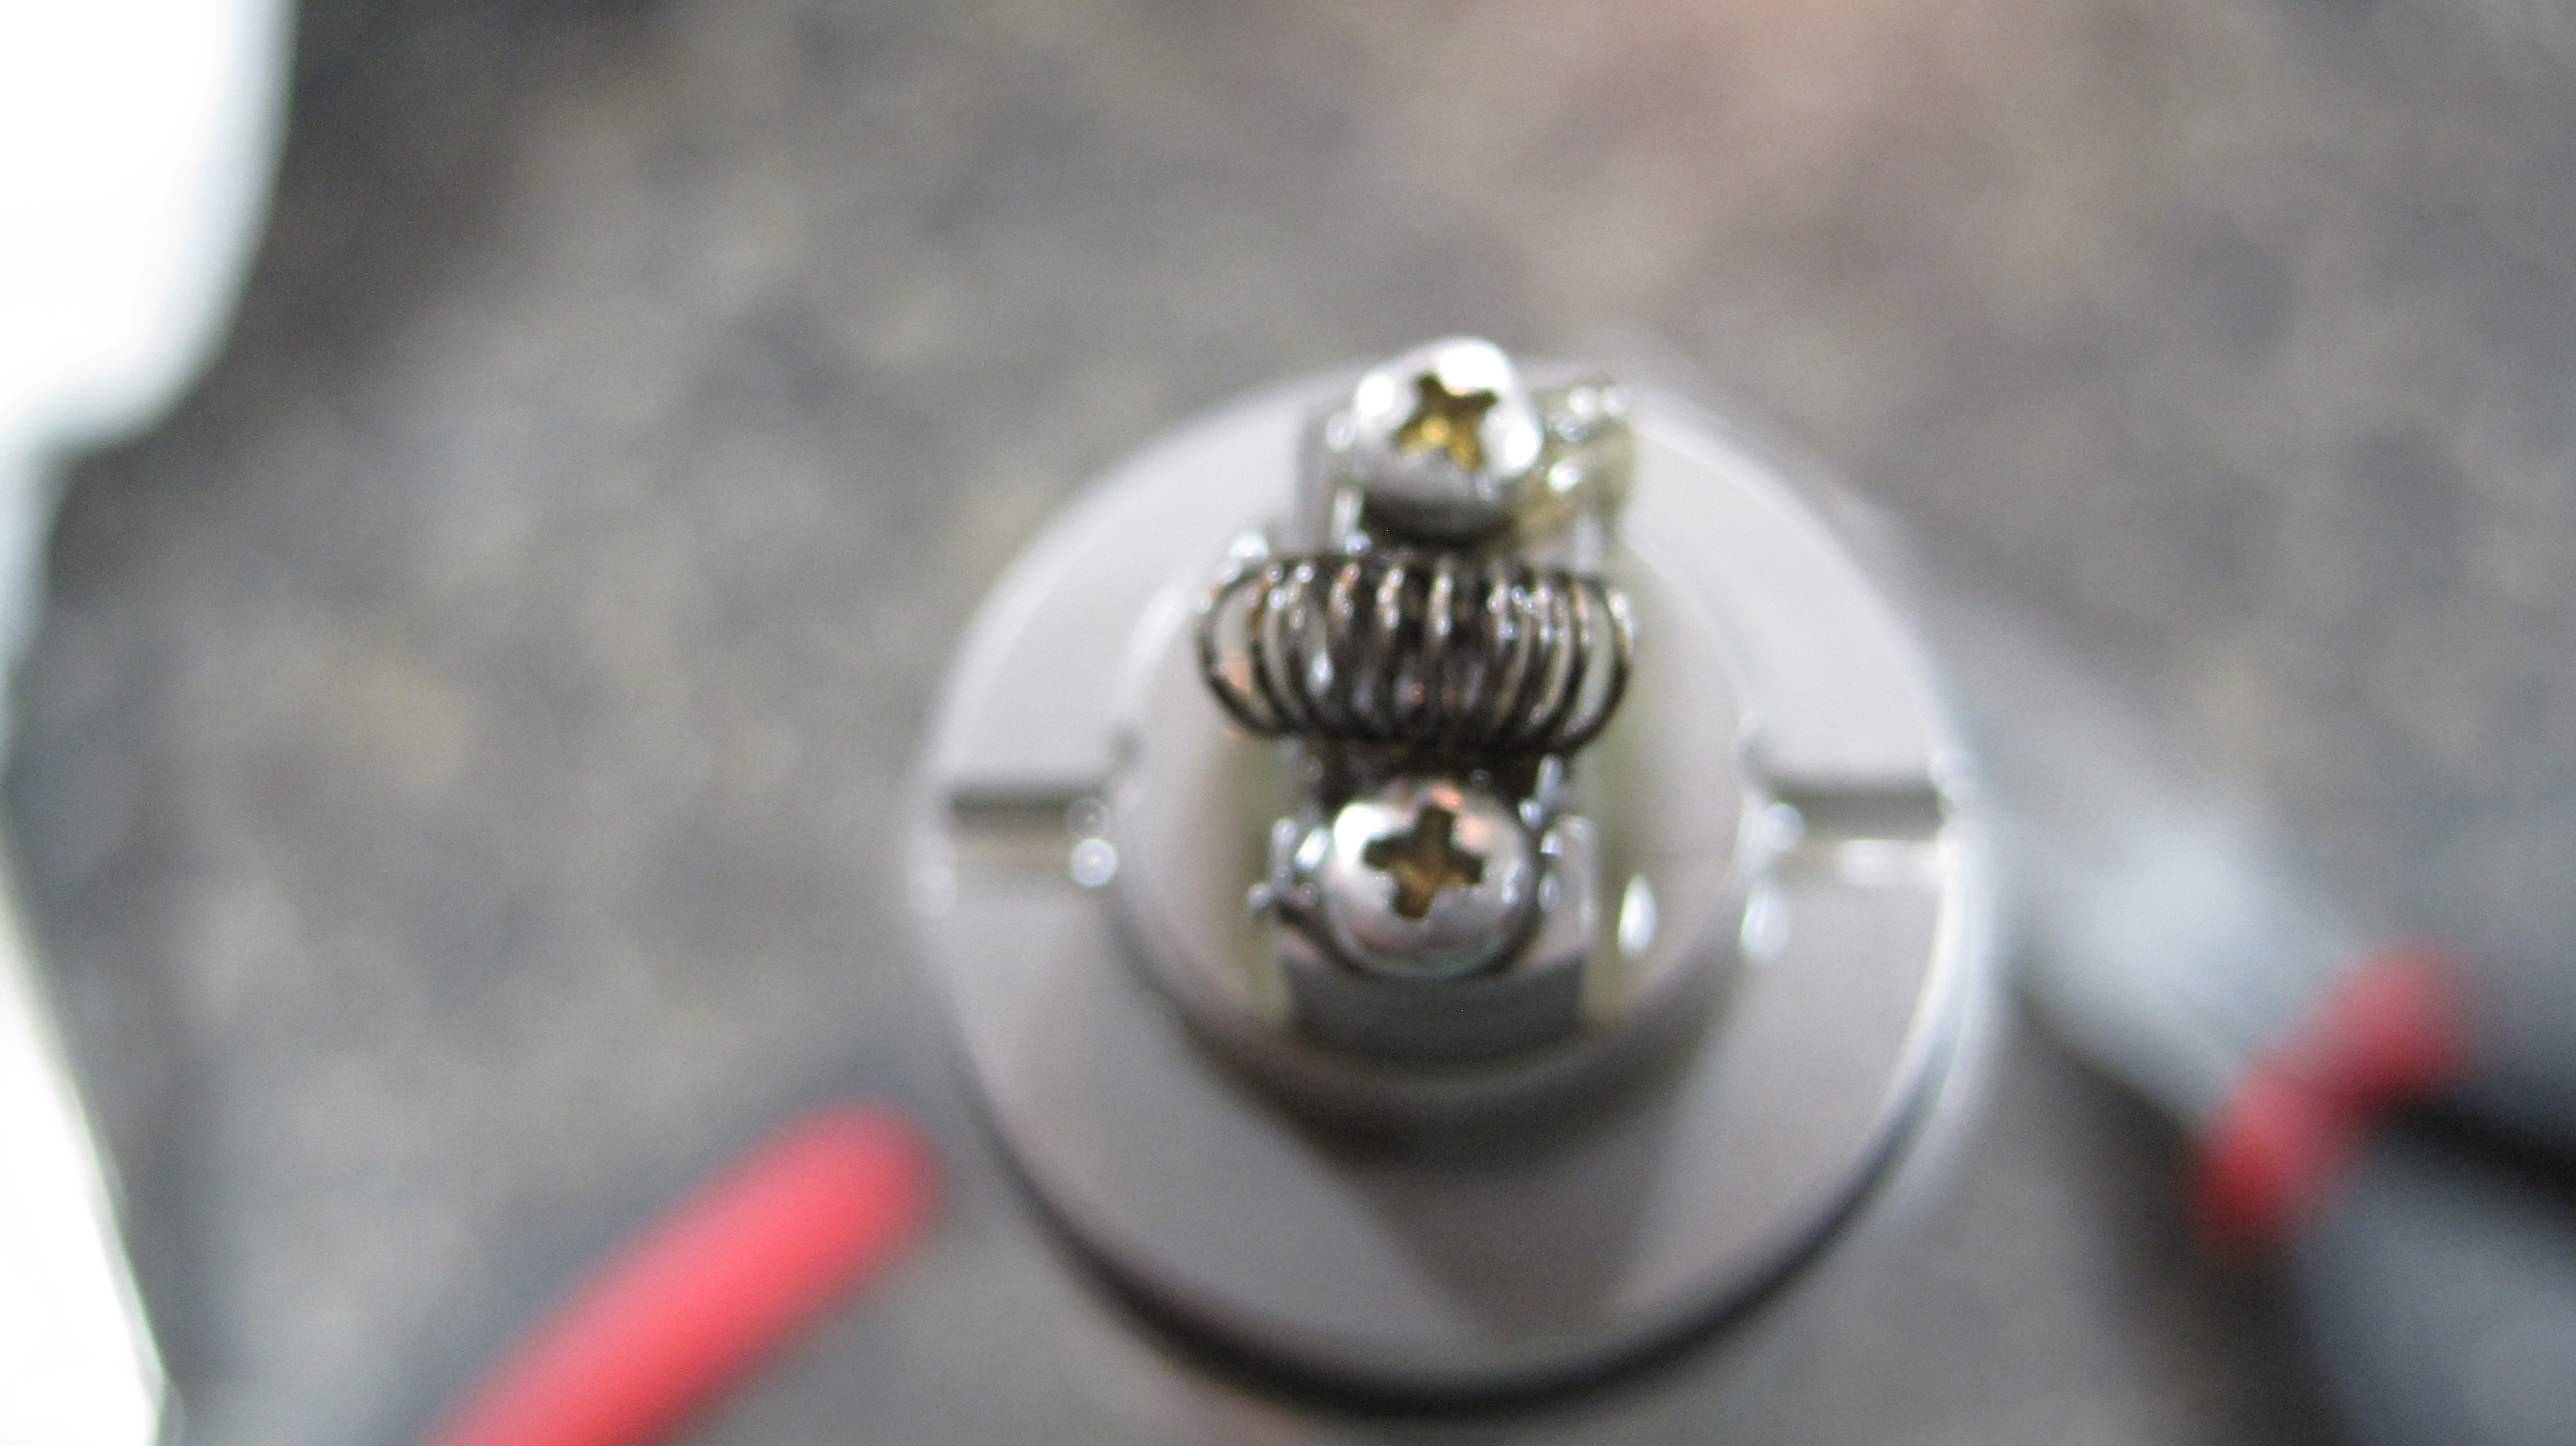
I then mounted this little beauty in the Russian:
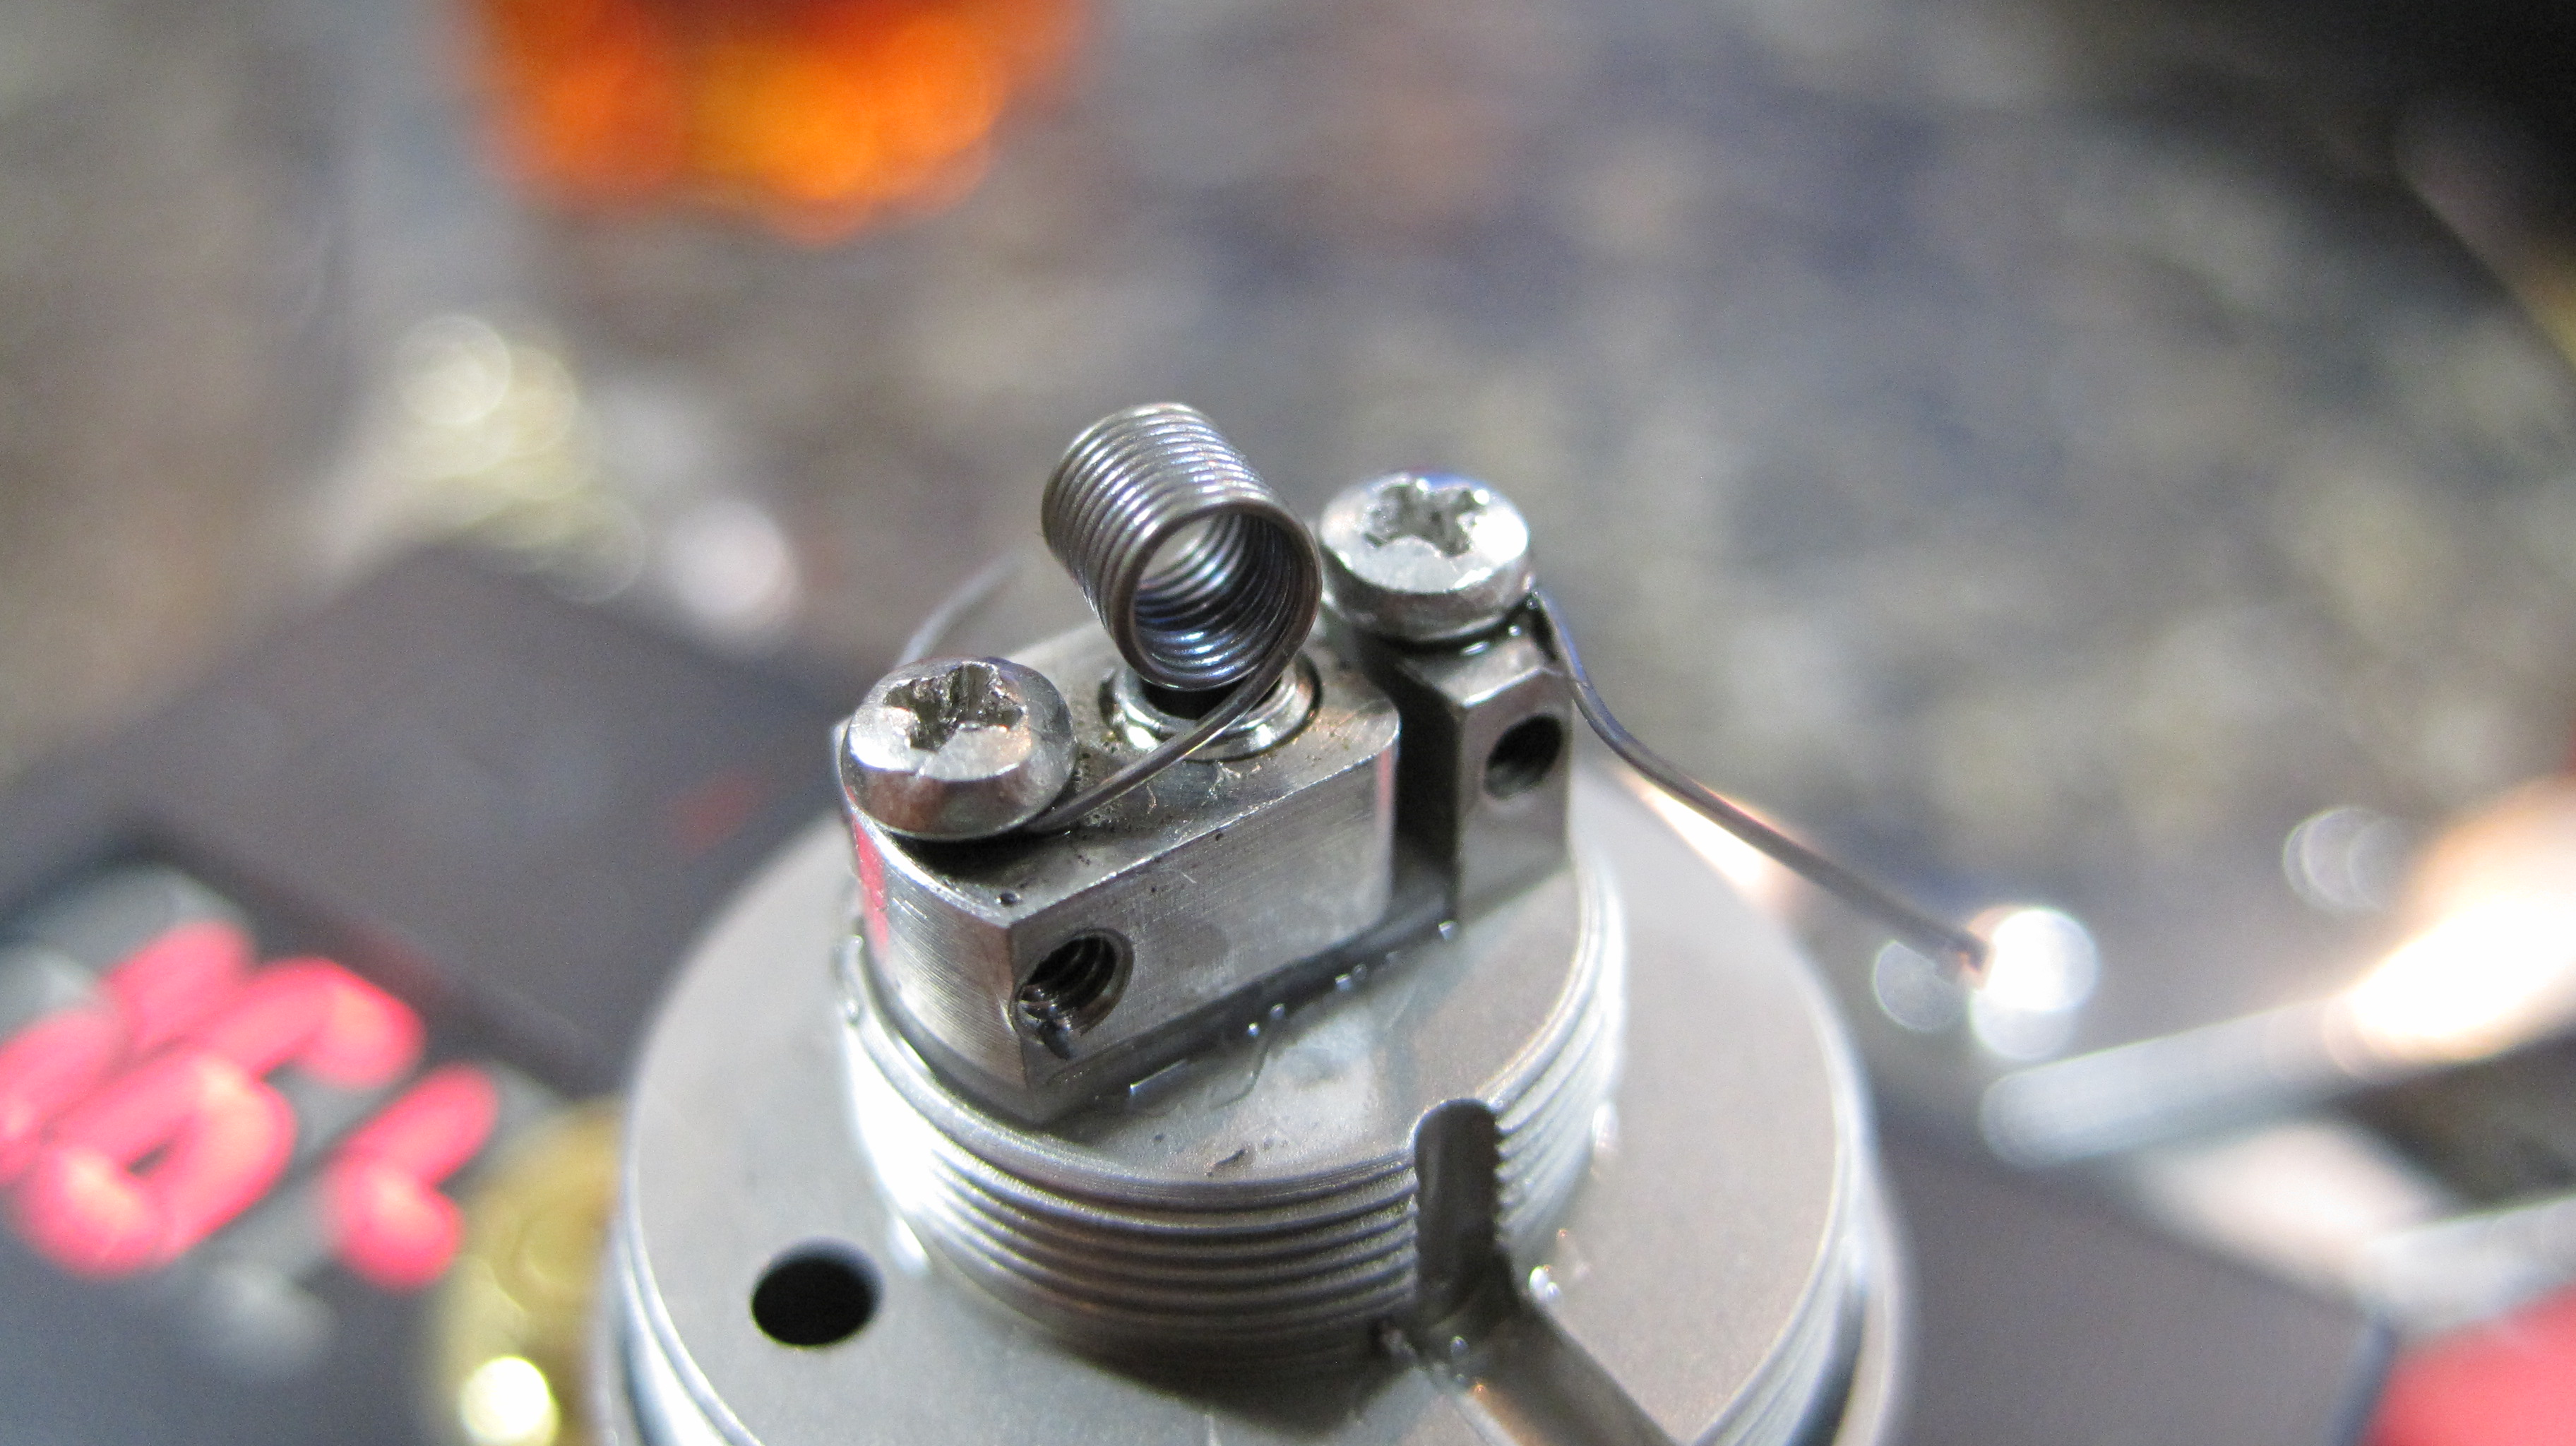
As you can see the resistance on this coil wind up at 1.64 ohms.
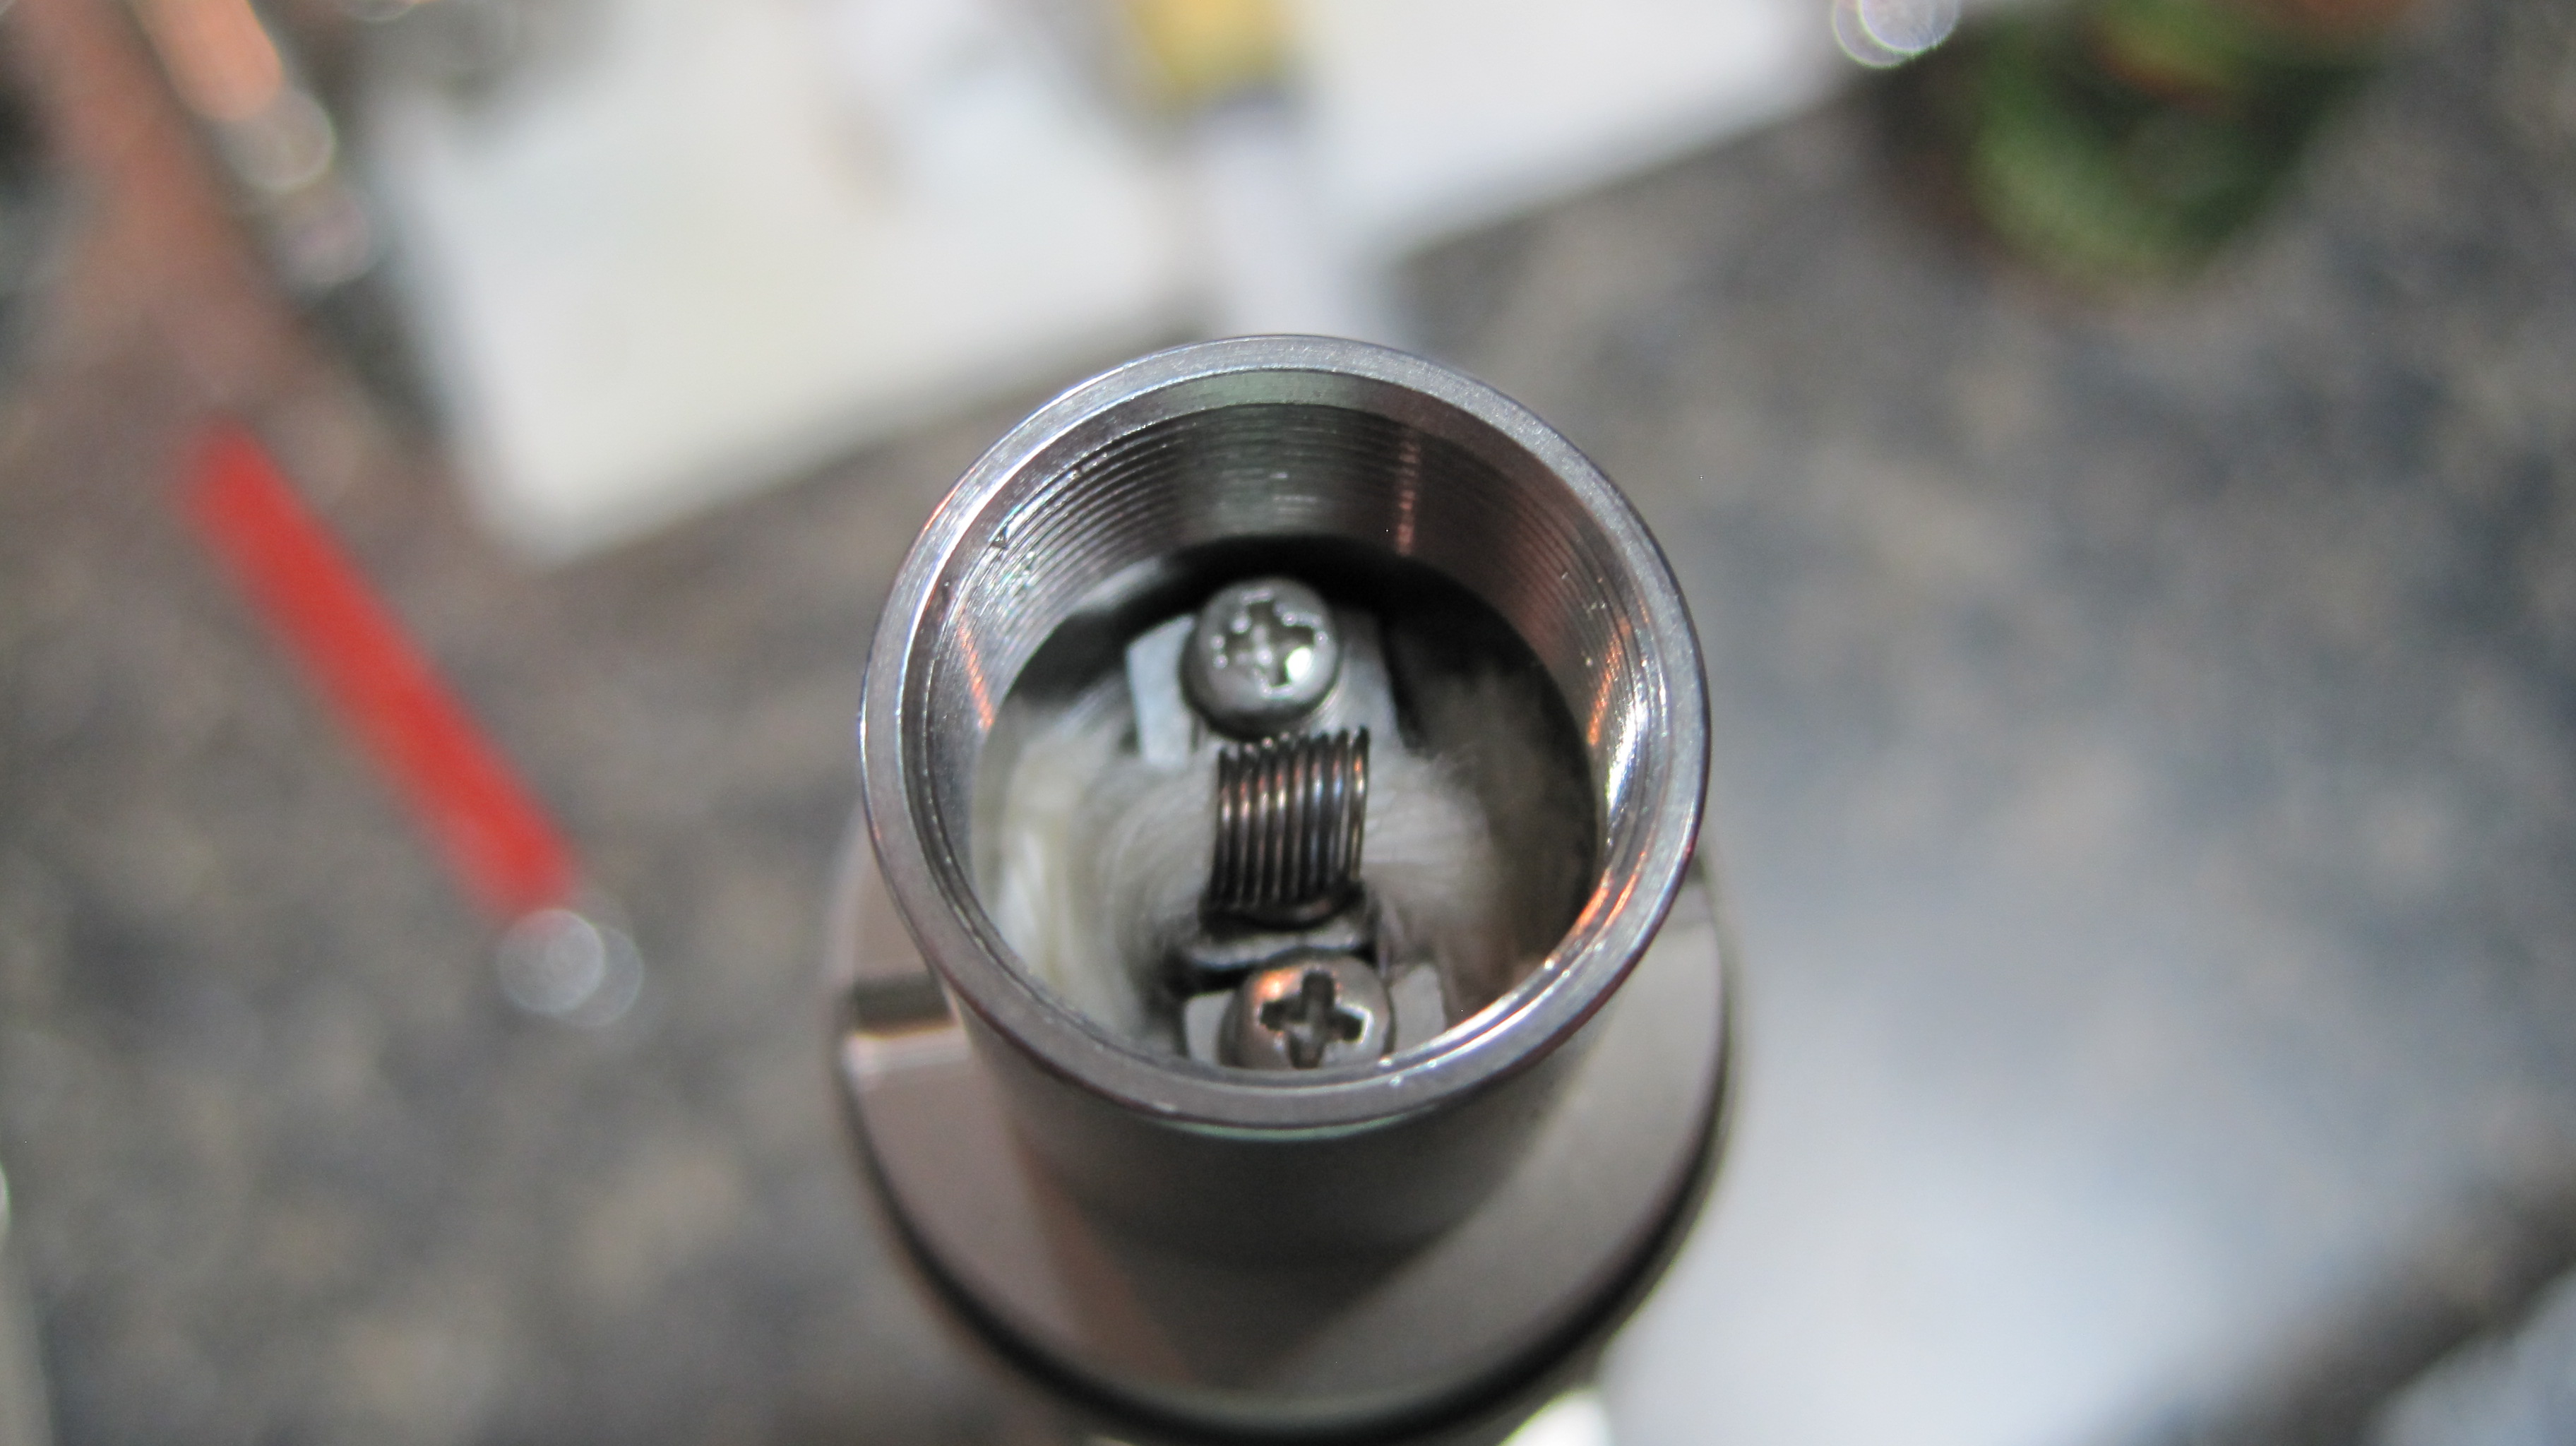
Now I put some organic cotton in there and buttoned it all up.
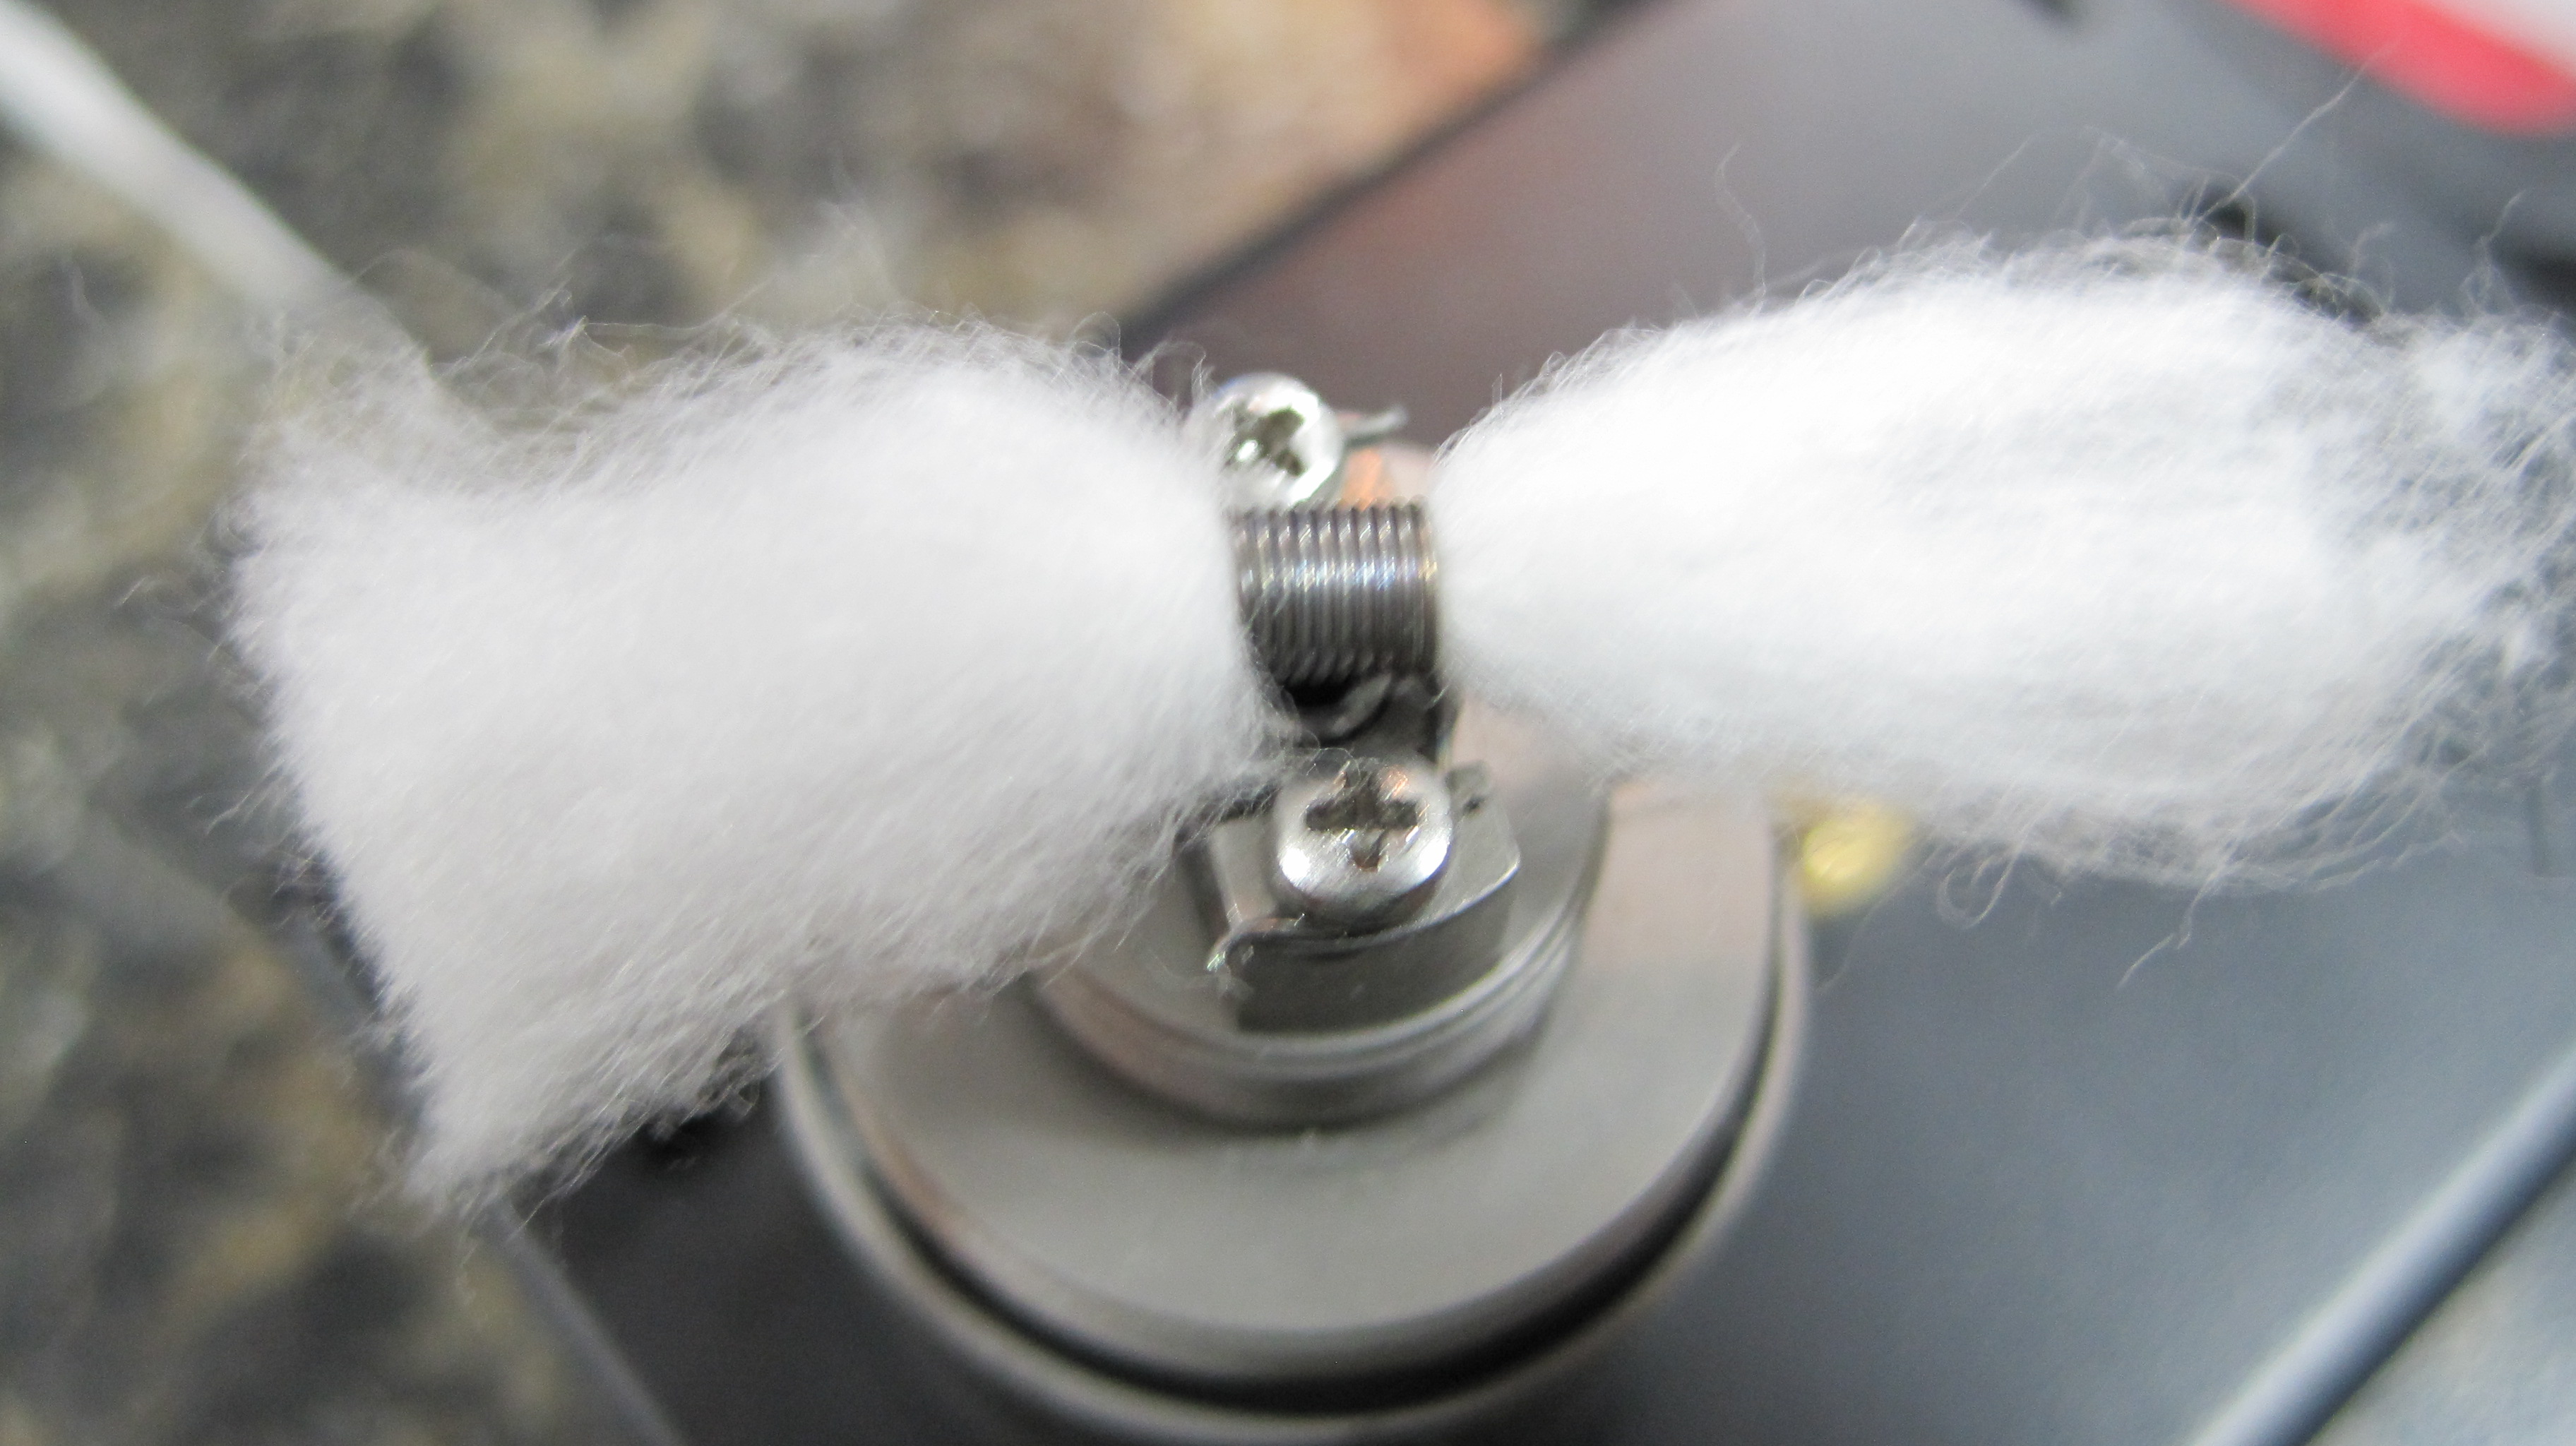
(maybe too much cotton, but I’m still playing)
Then I started vaping. Really good, but I knew right away that I wanted to back off my resistance a bit, but there was more playing that needed to be done.
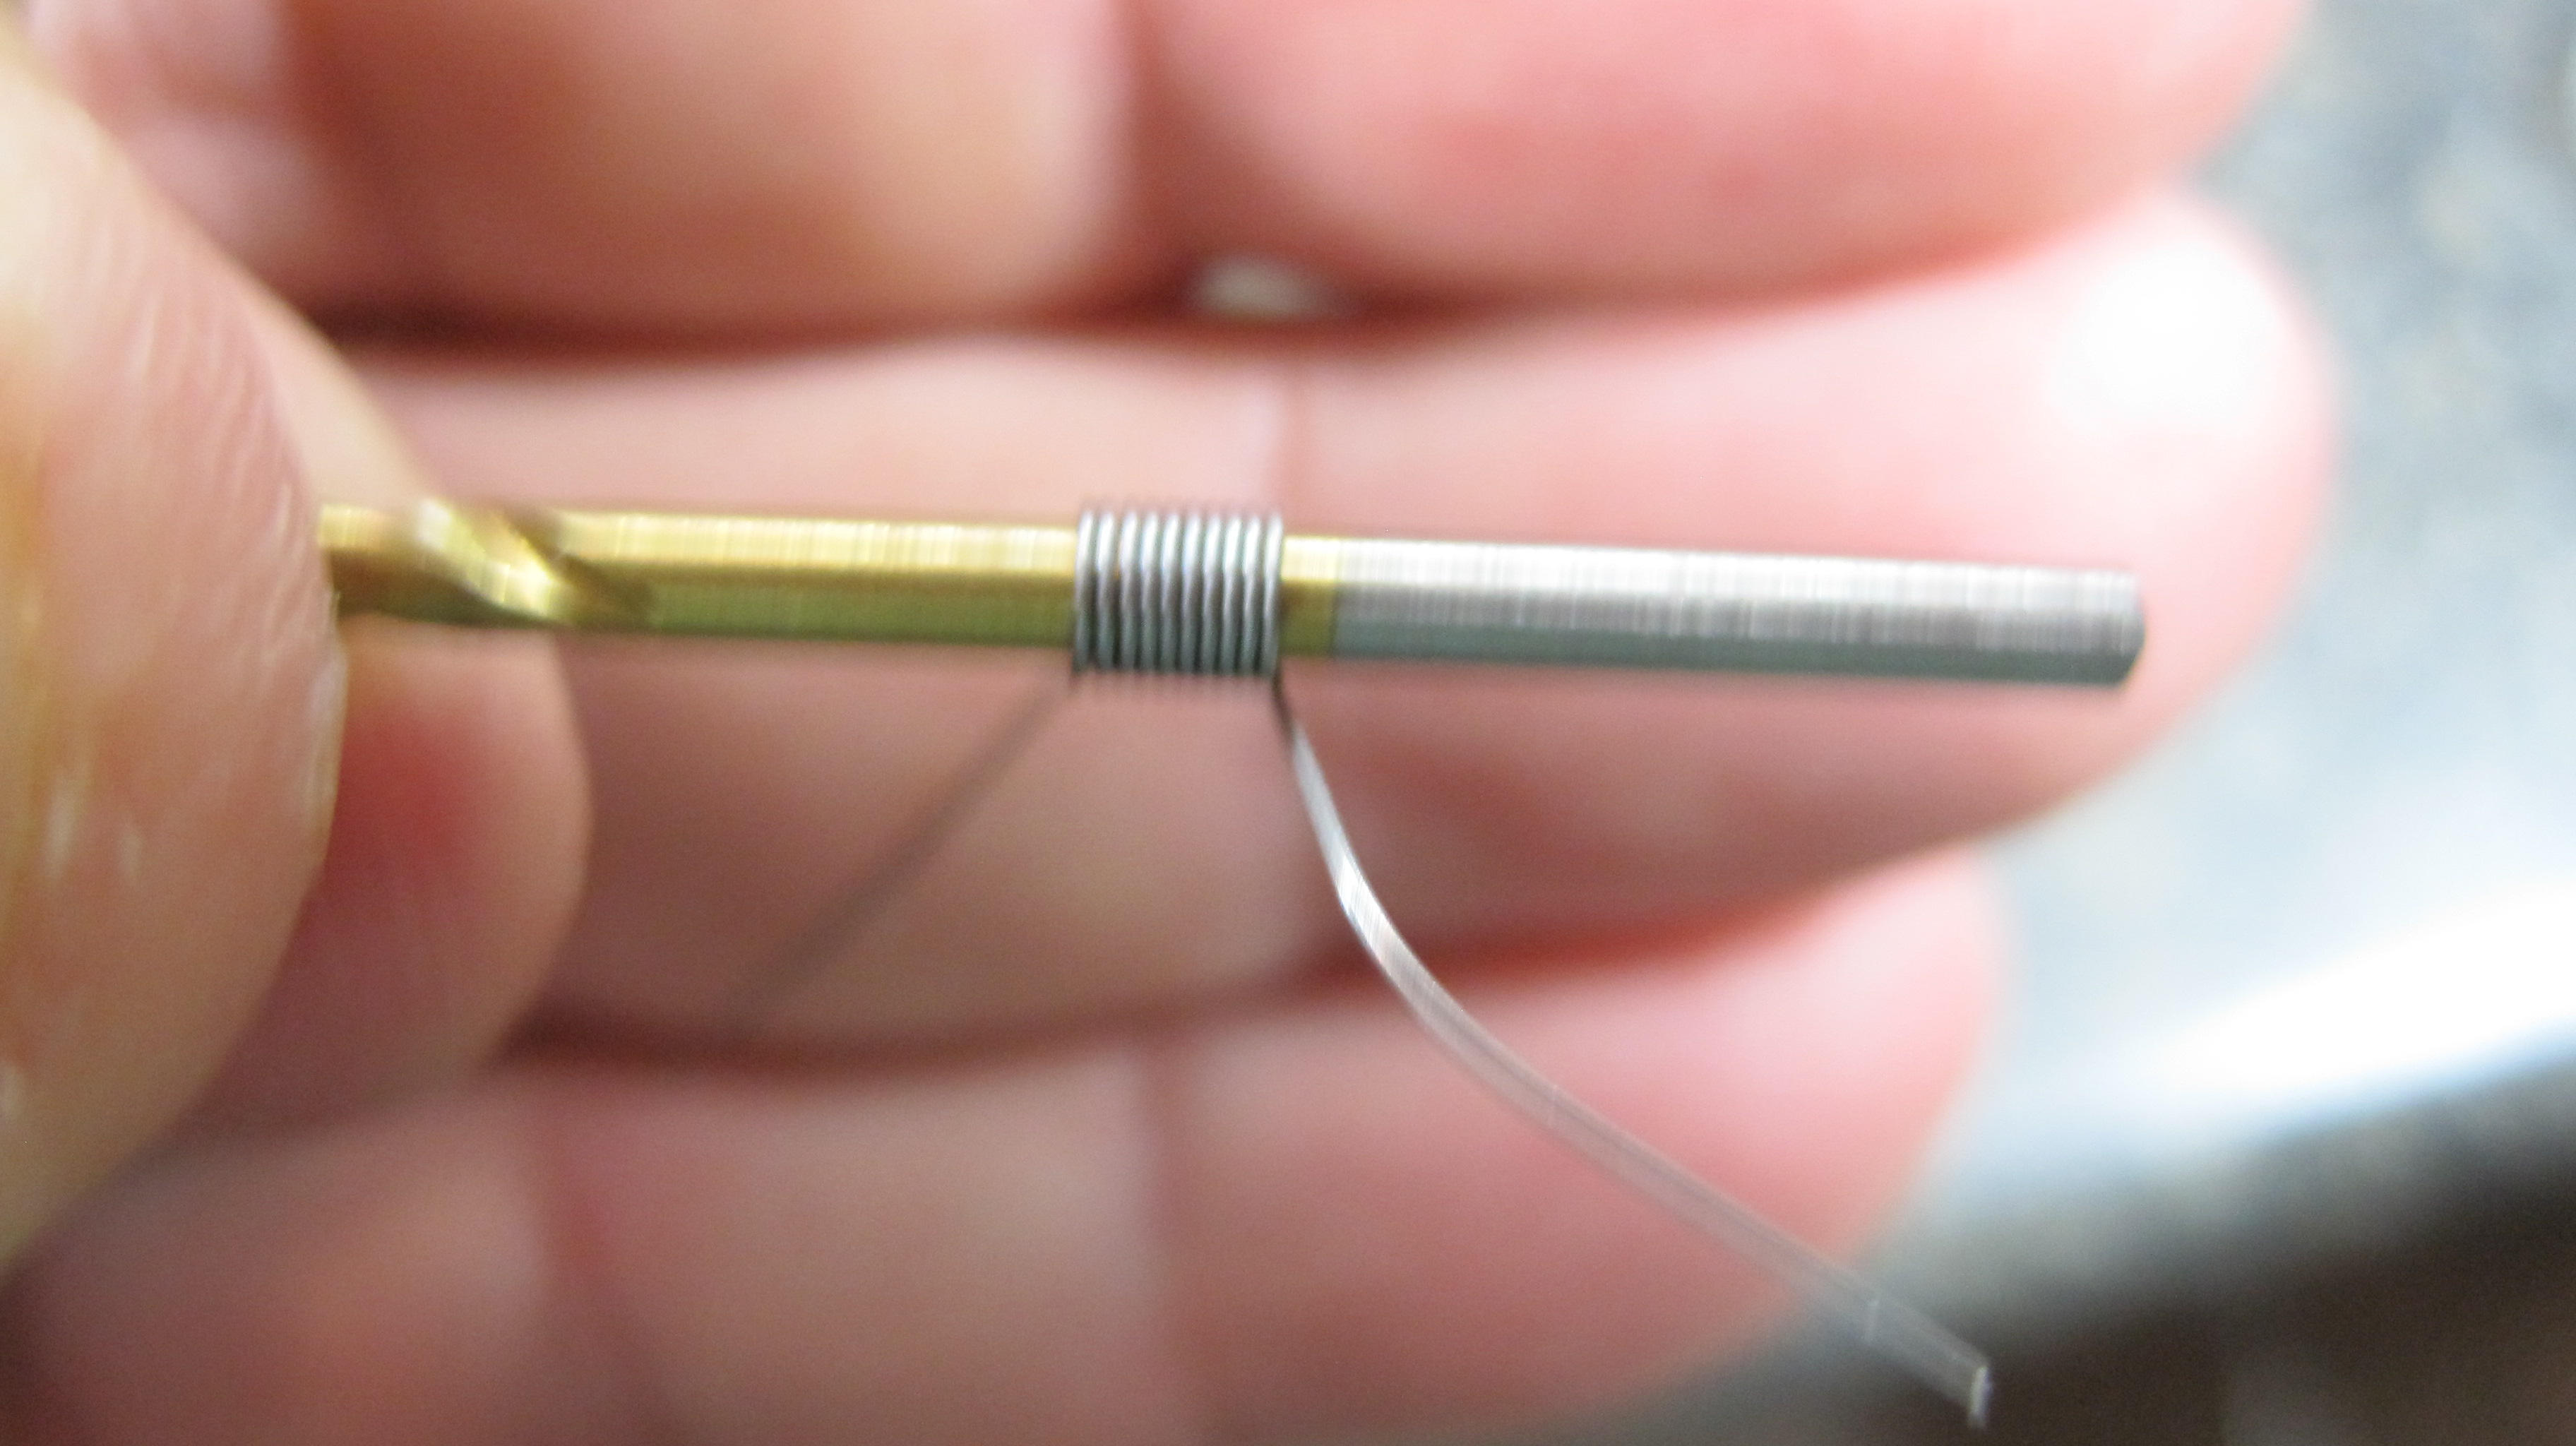
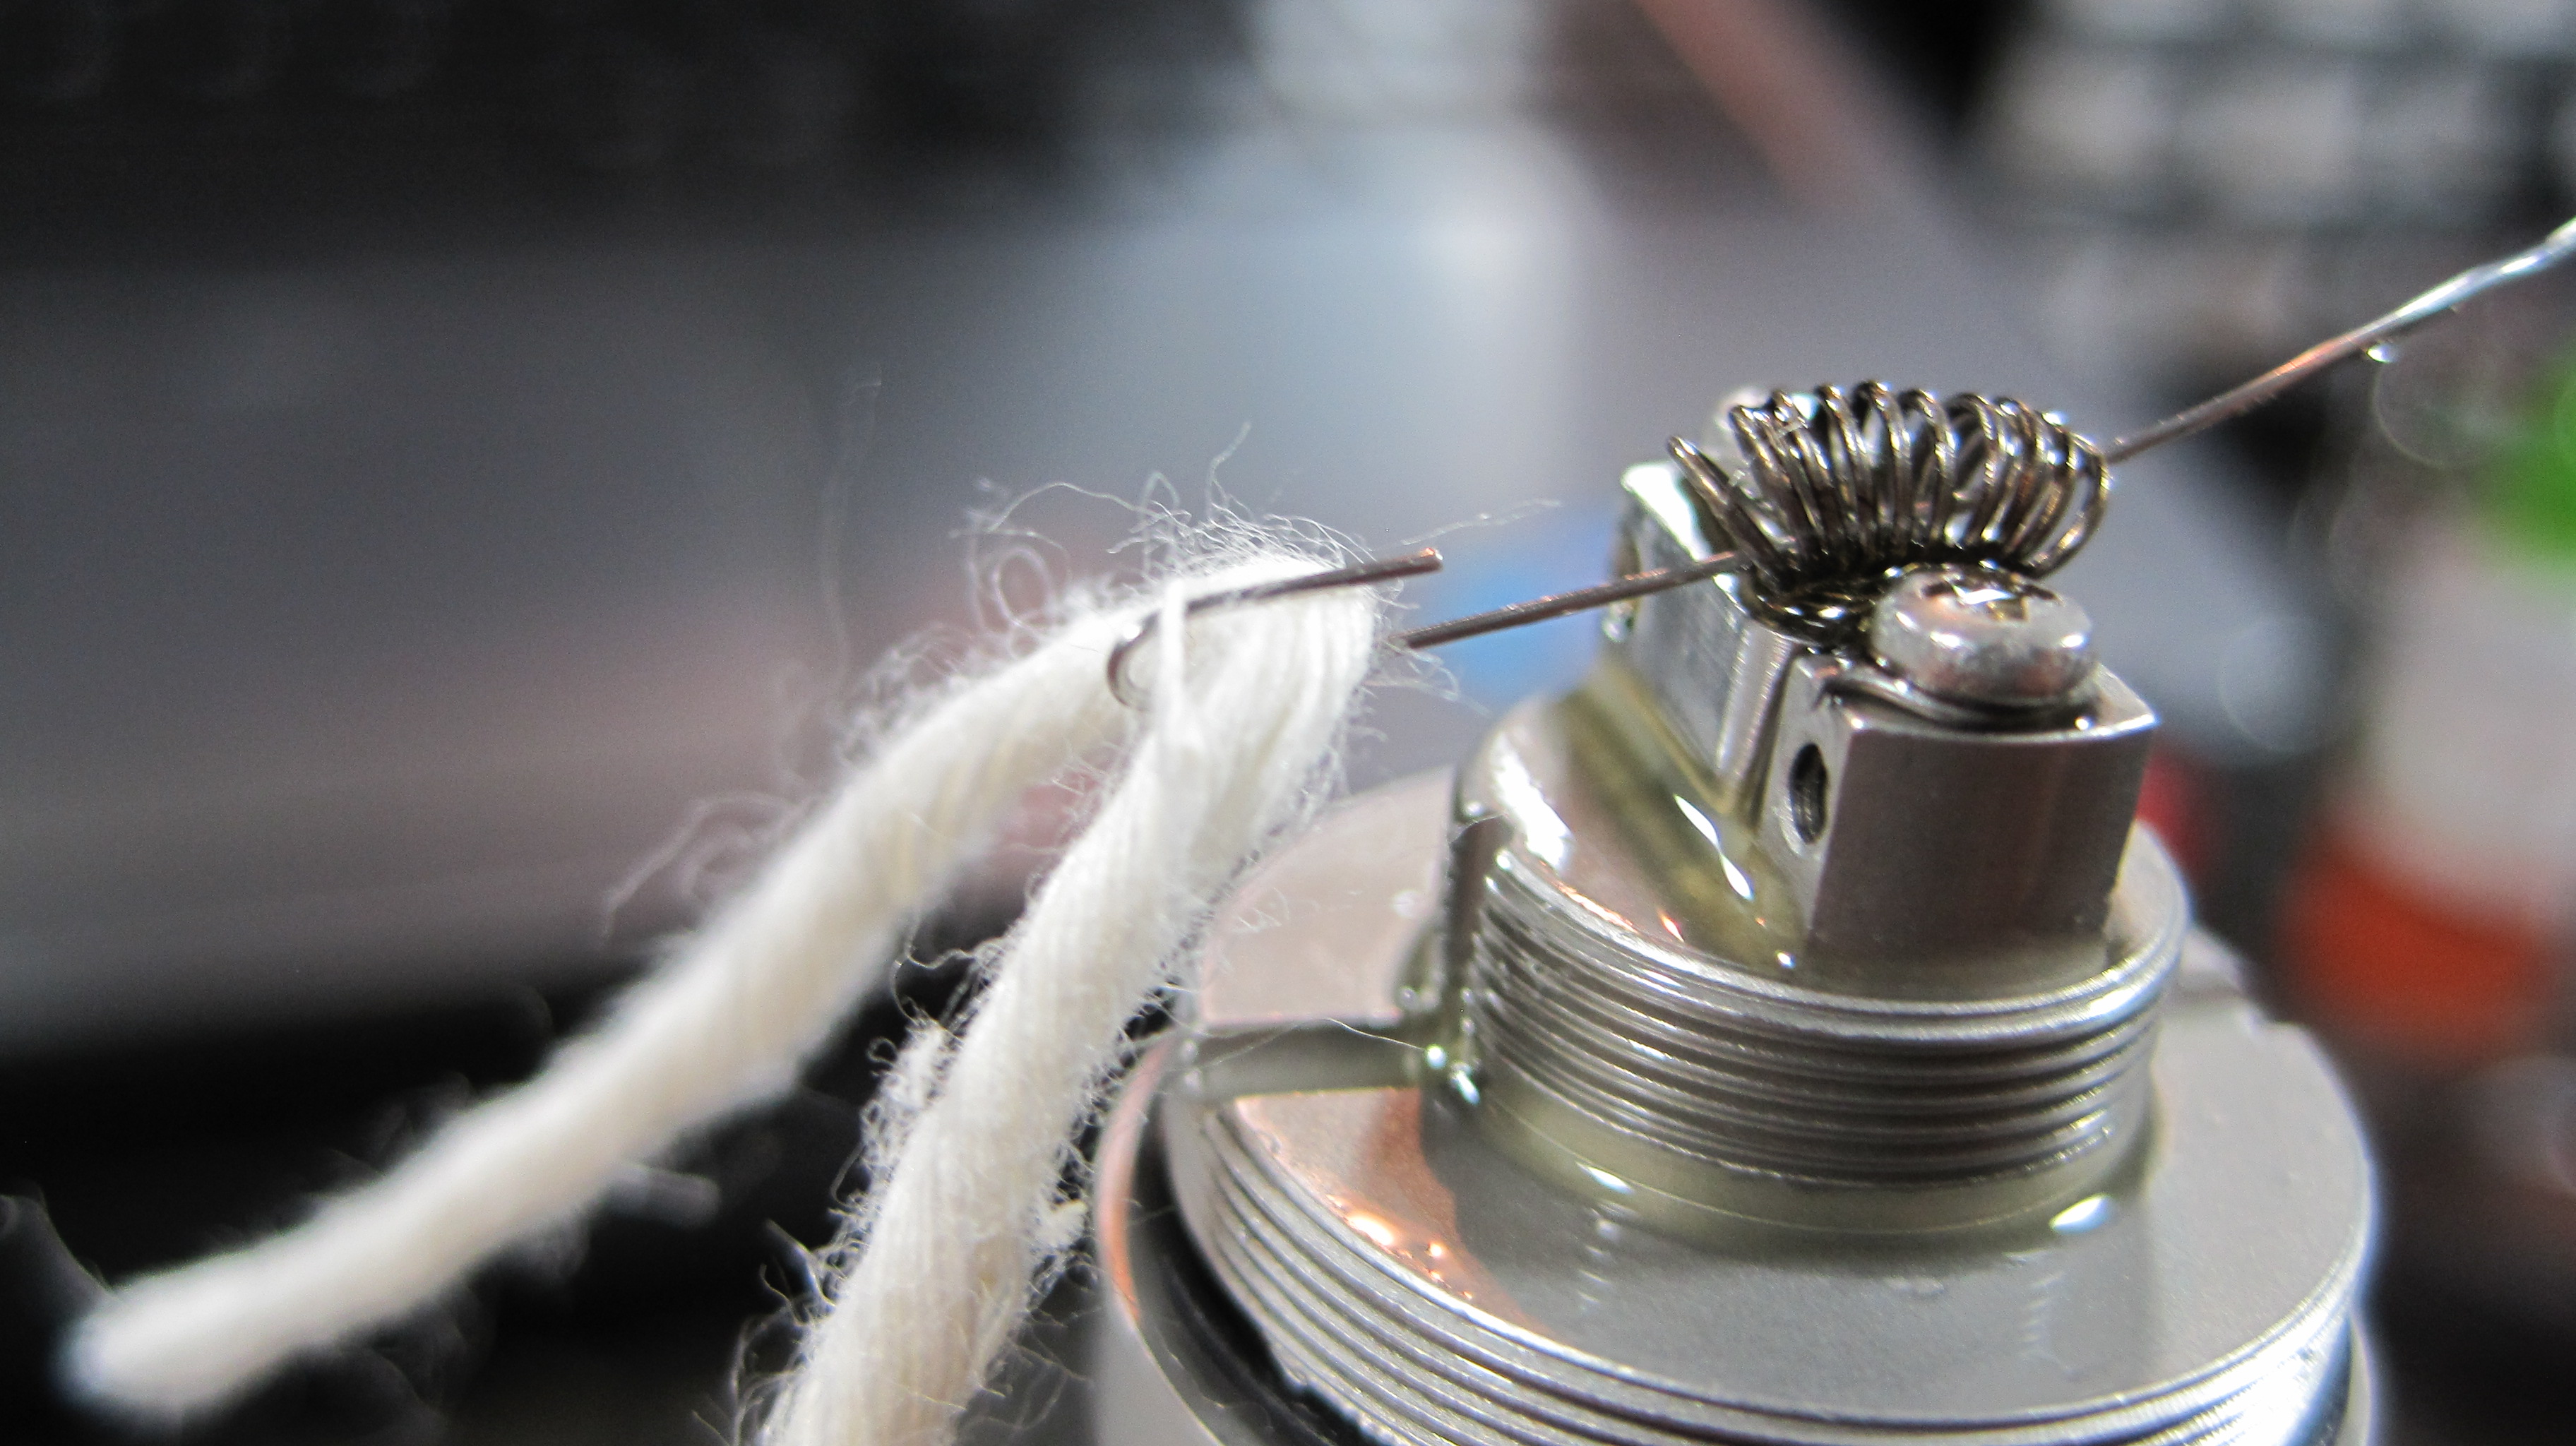
I wanted to see the difference between organic cotton balls and the Organic Cotton Hemp Wick I got from Mod And World. A single strand was too loose in this hole (insert joke here) so I needed to get two strands through. I used a piece of 28 gauge Kanthal as a fish hook to get it through the coil.
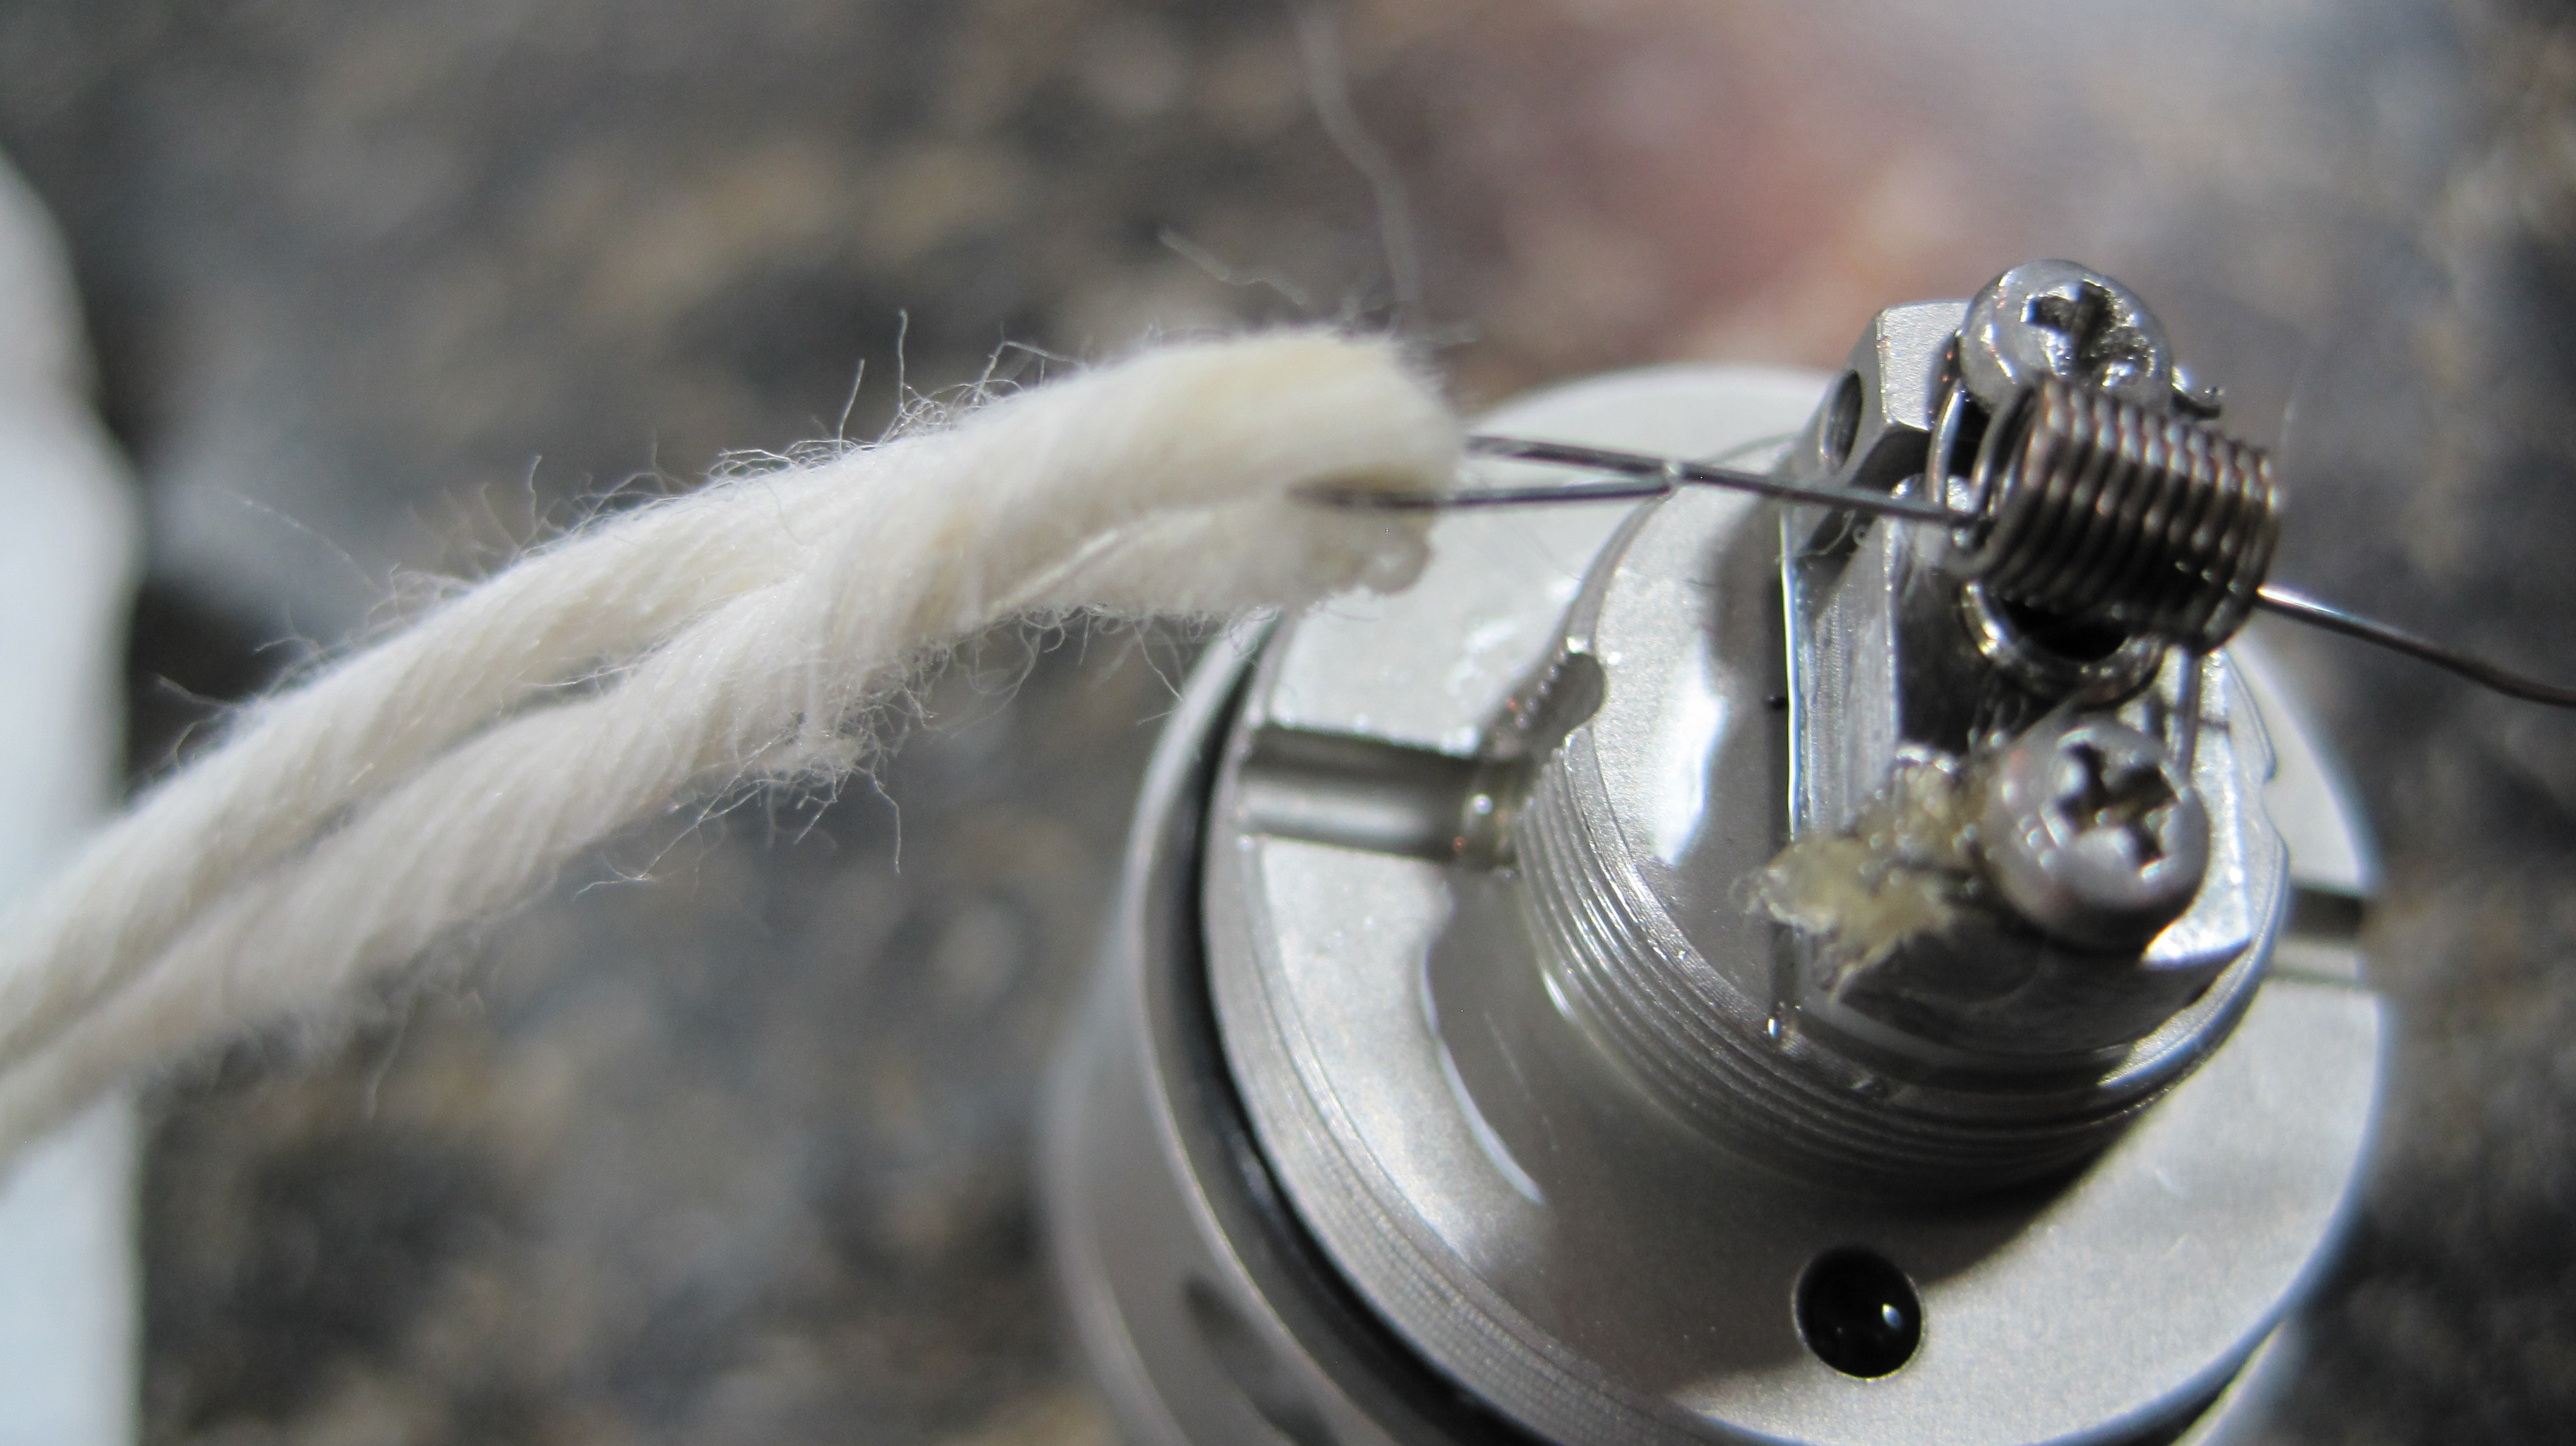
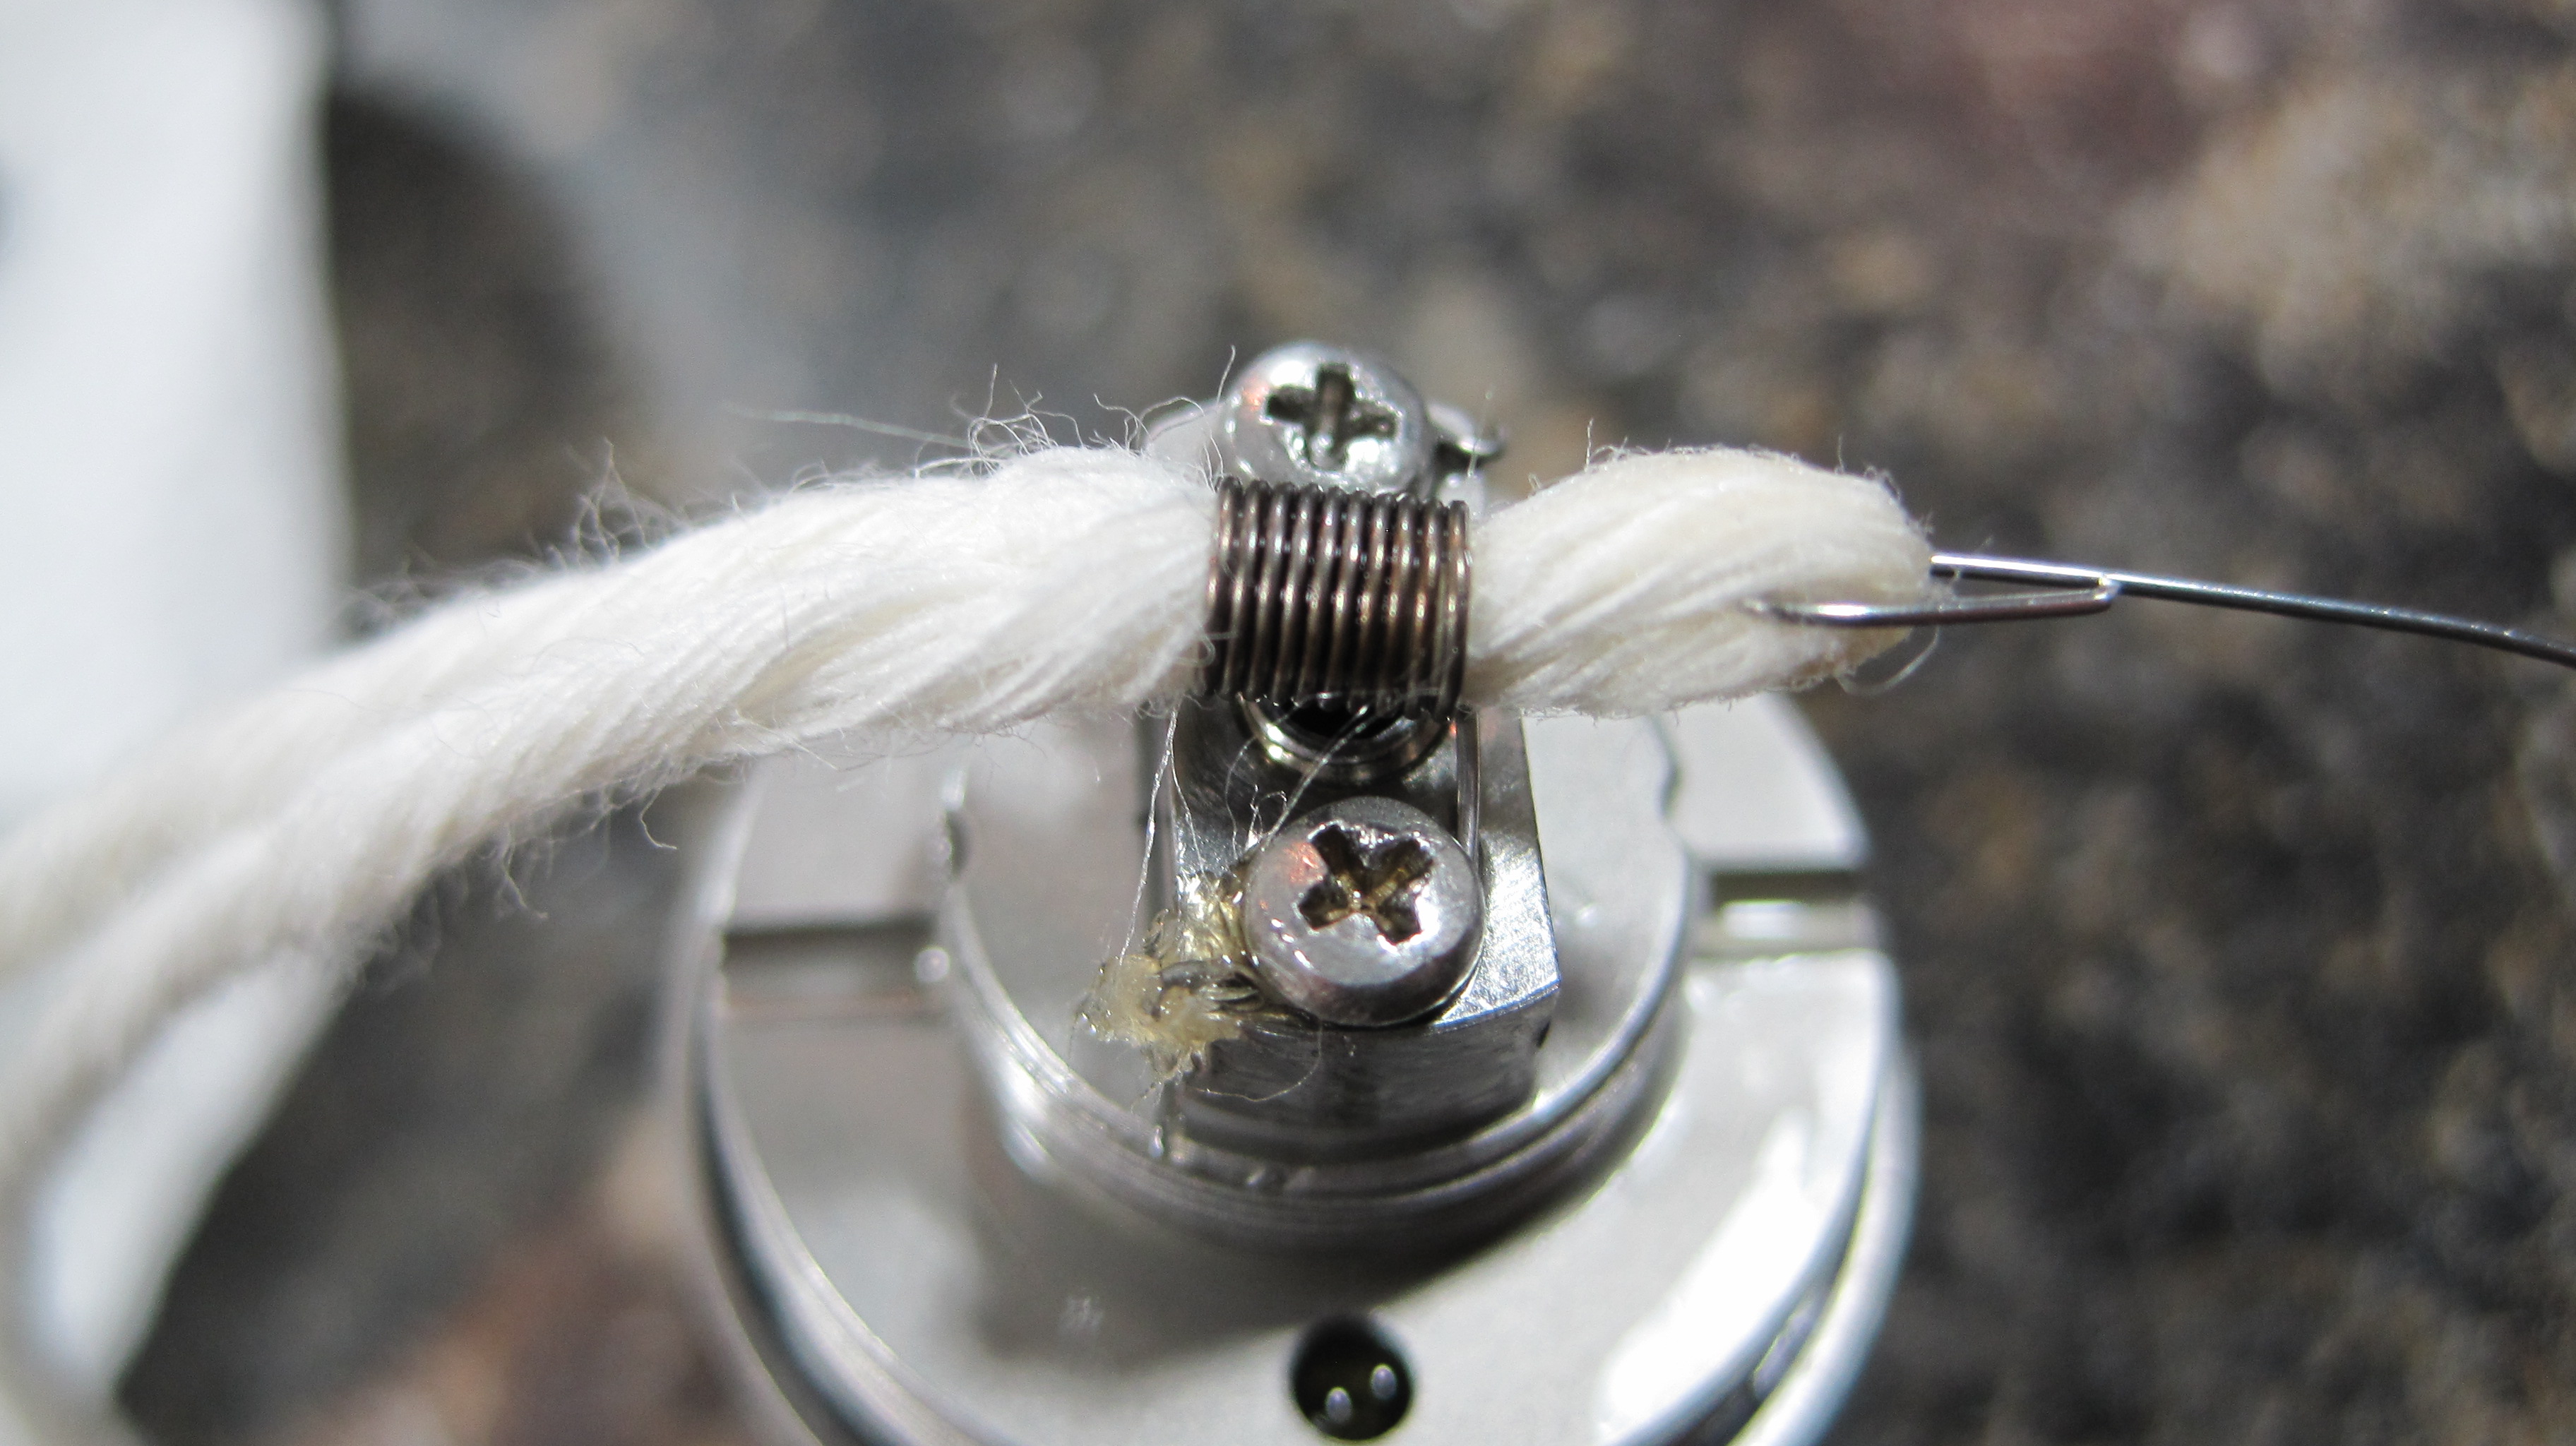
This got me the good wire to wick contact I’m always looking for.
Off the bat, I liked the flavor of the cotton better, but the wicking of this cord a little better. That could, of course, be a function of the amount of cotton or placement so more playing would be prudent. Also, I didn’t boil the hemp wick before installing it. So the wick performance and flavor is still up in the air at this point, at least for me.
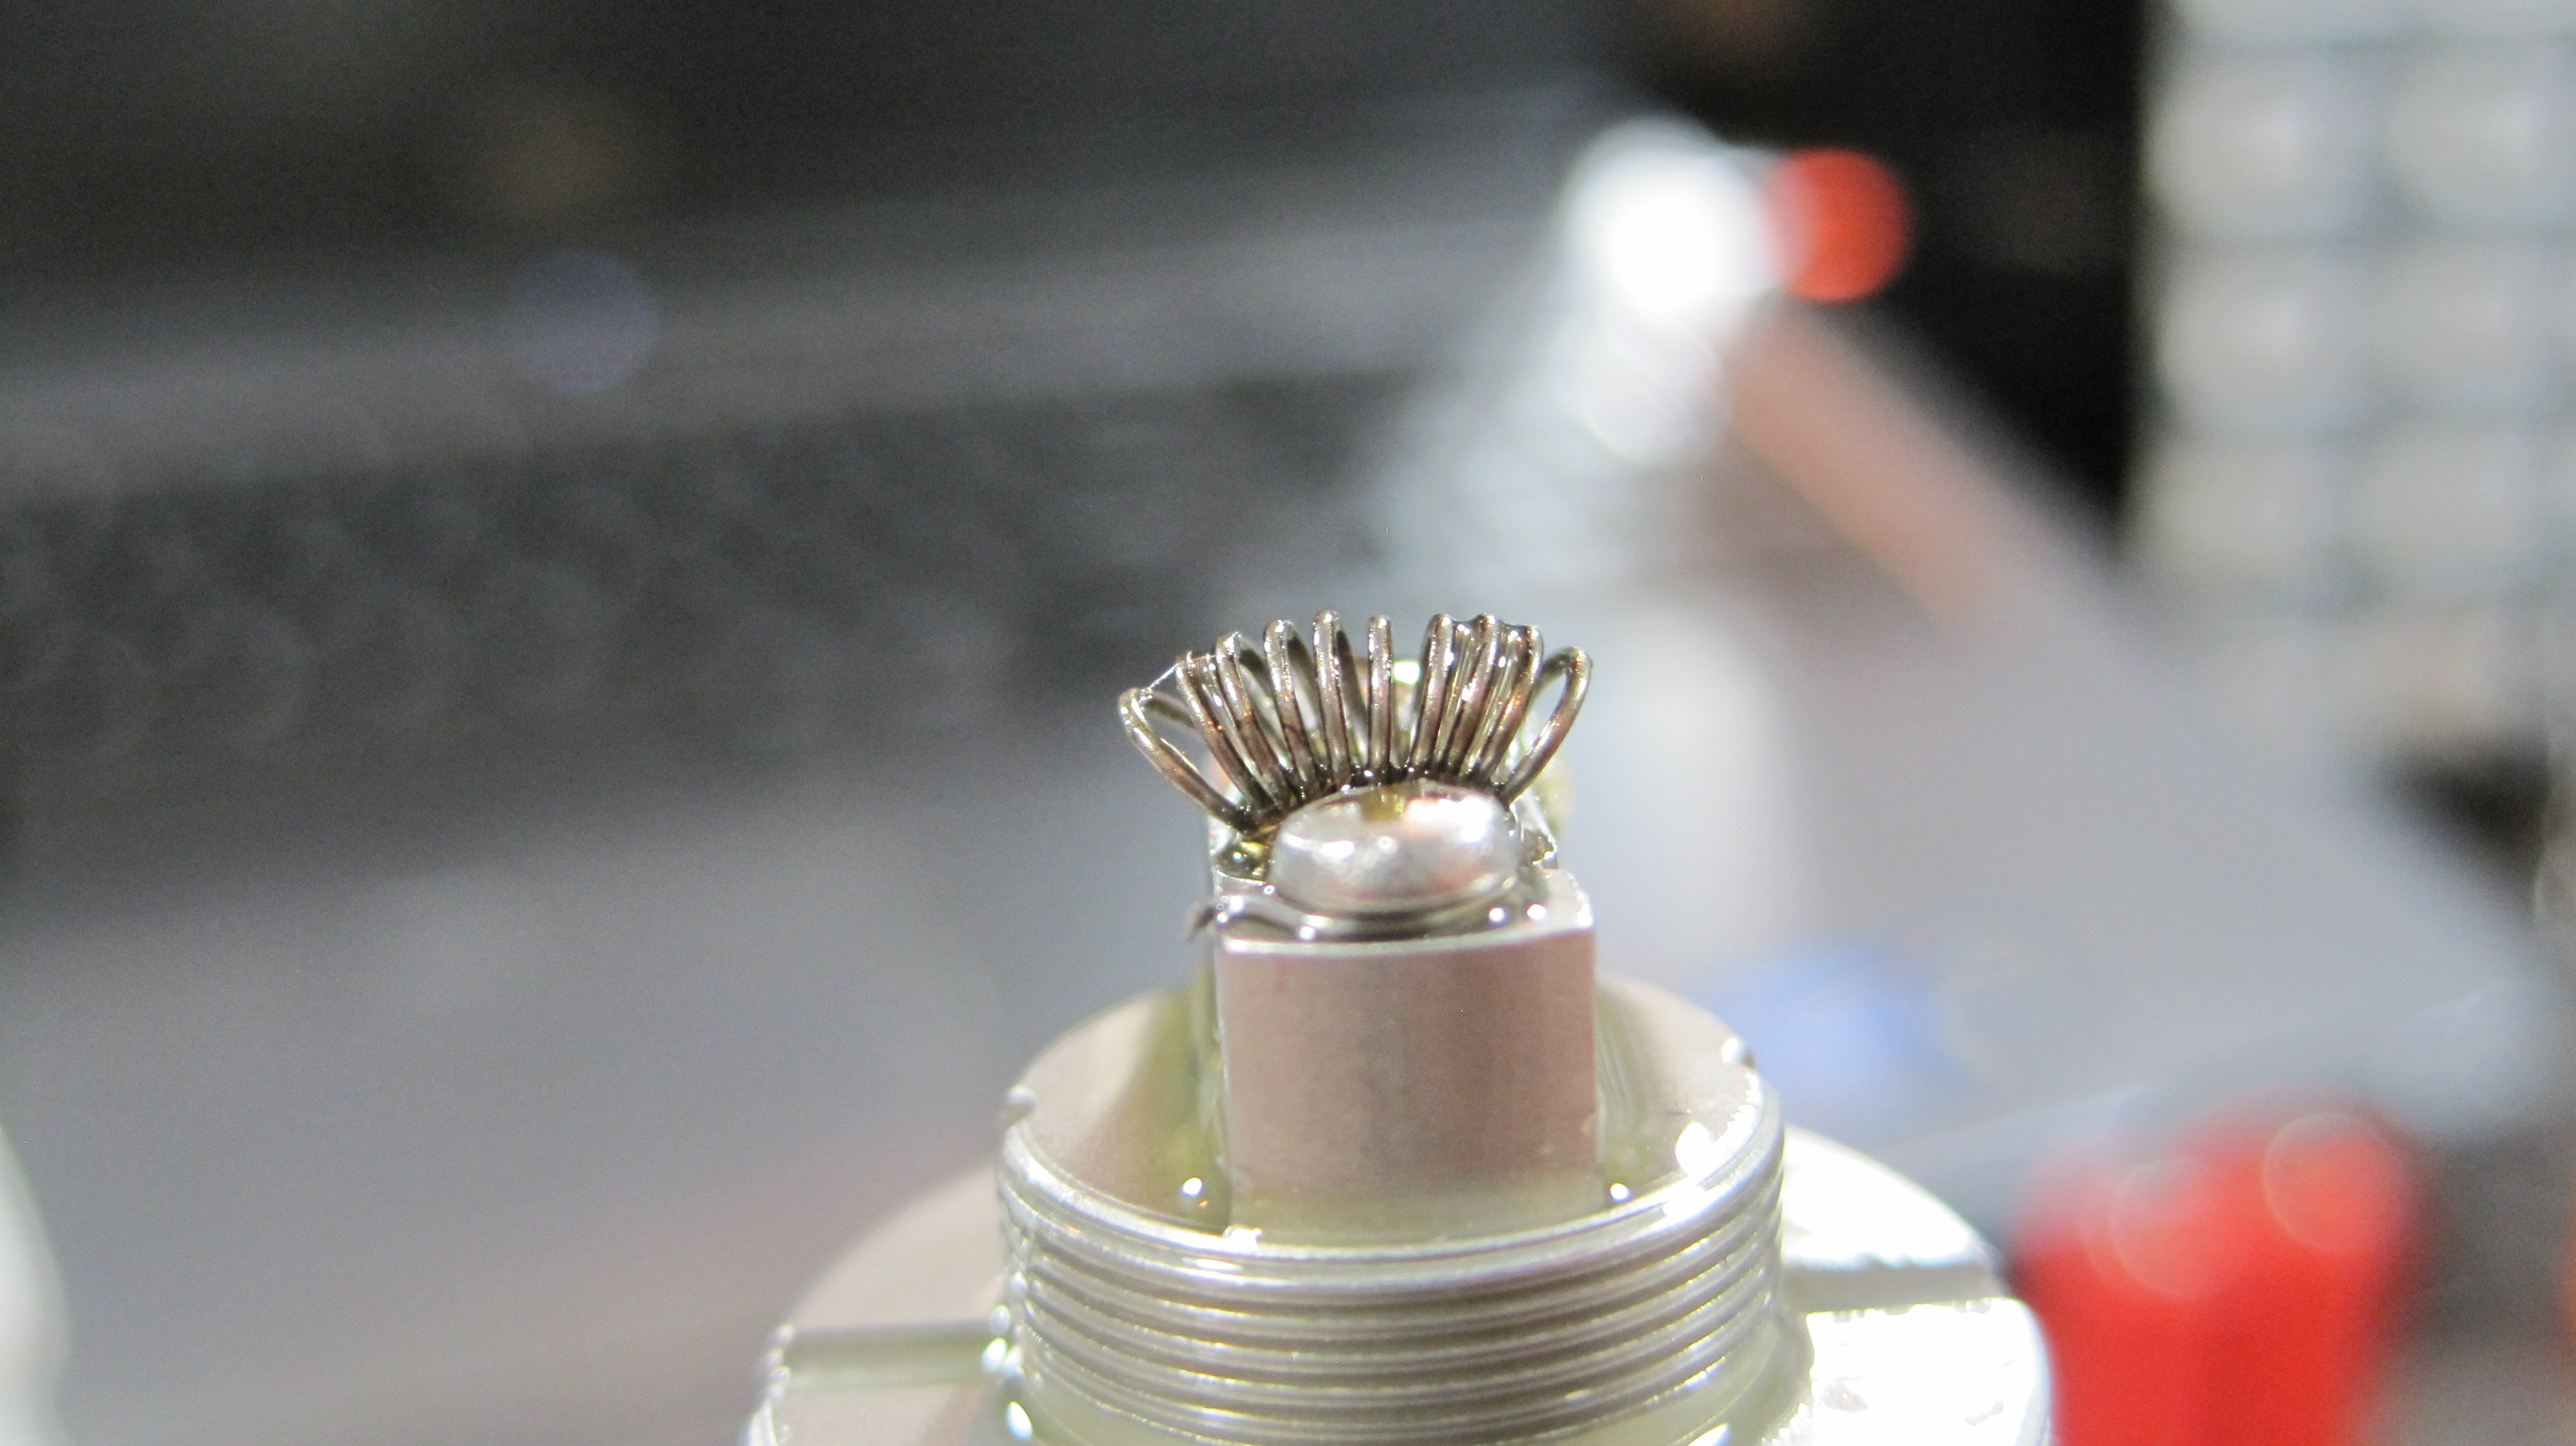
But then, I did the most important experiment directed at the thing that has been bothering me most about Micro Coils. If I look at the design, it leads me to believe that a certain amount of vapor is being blocked because of the inherent design of this coil. Since the coils are touching, vapor that could be produced isn’t being produced as it’s being blocked by the coil, so what I did was this:

After trying this coil, what is the design that’s traveling with me to California?
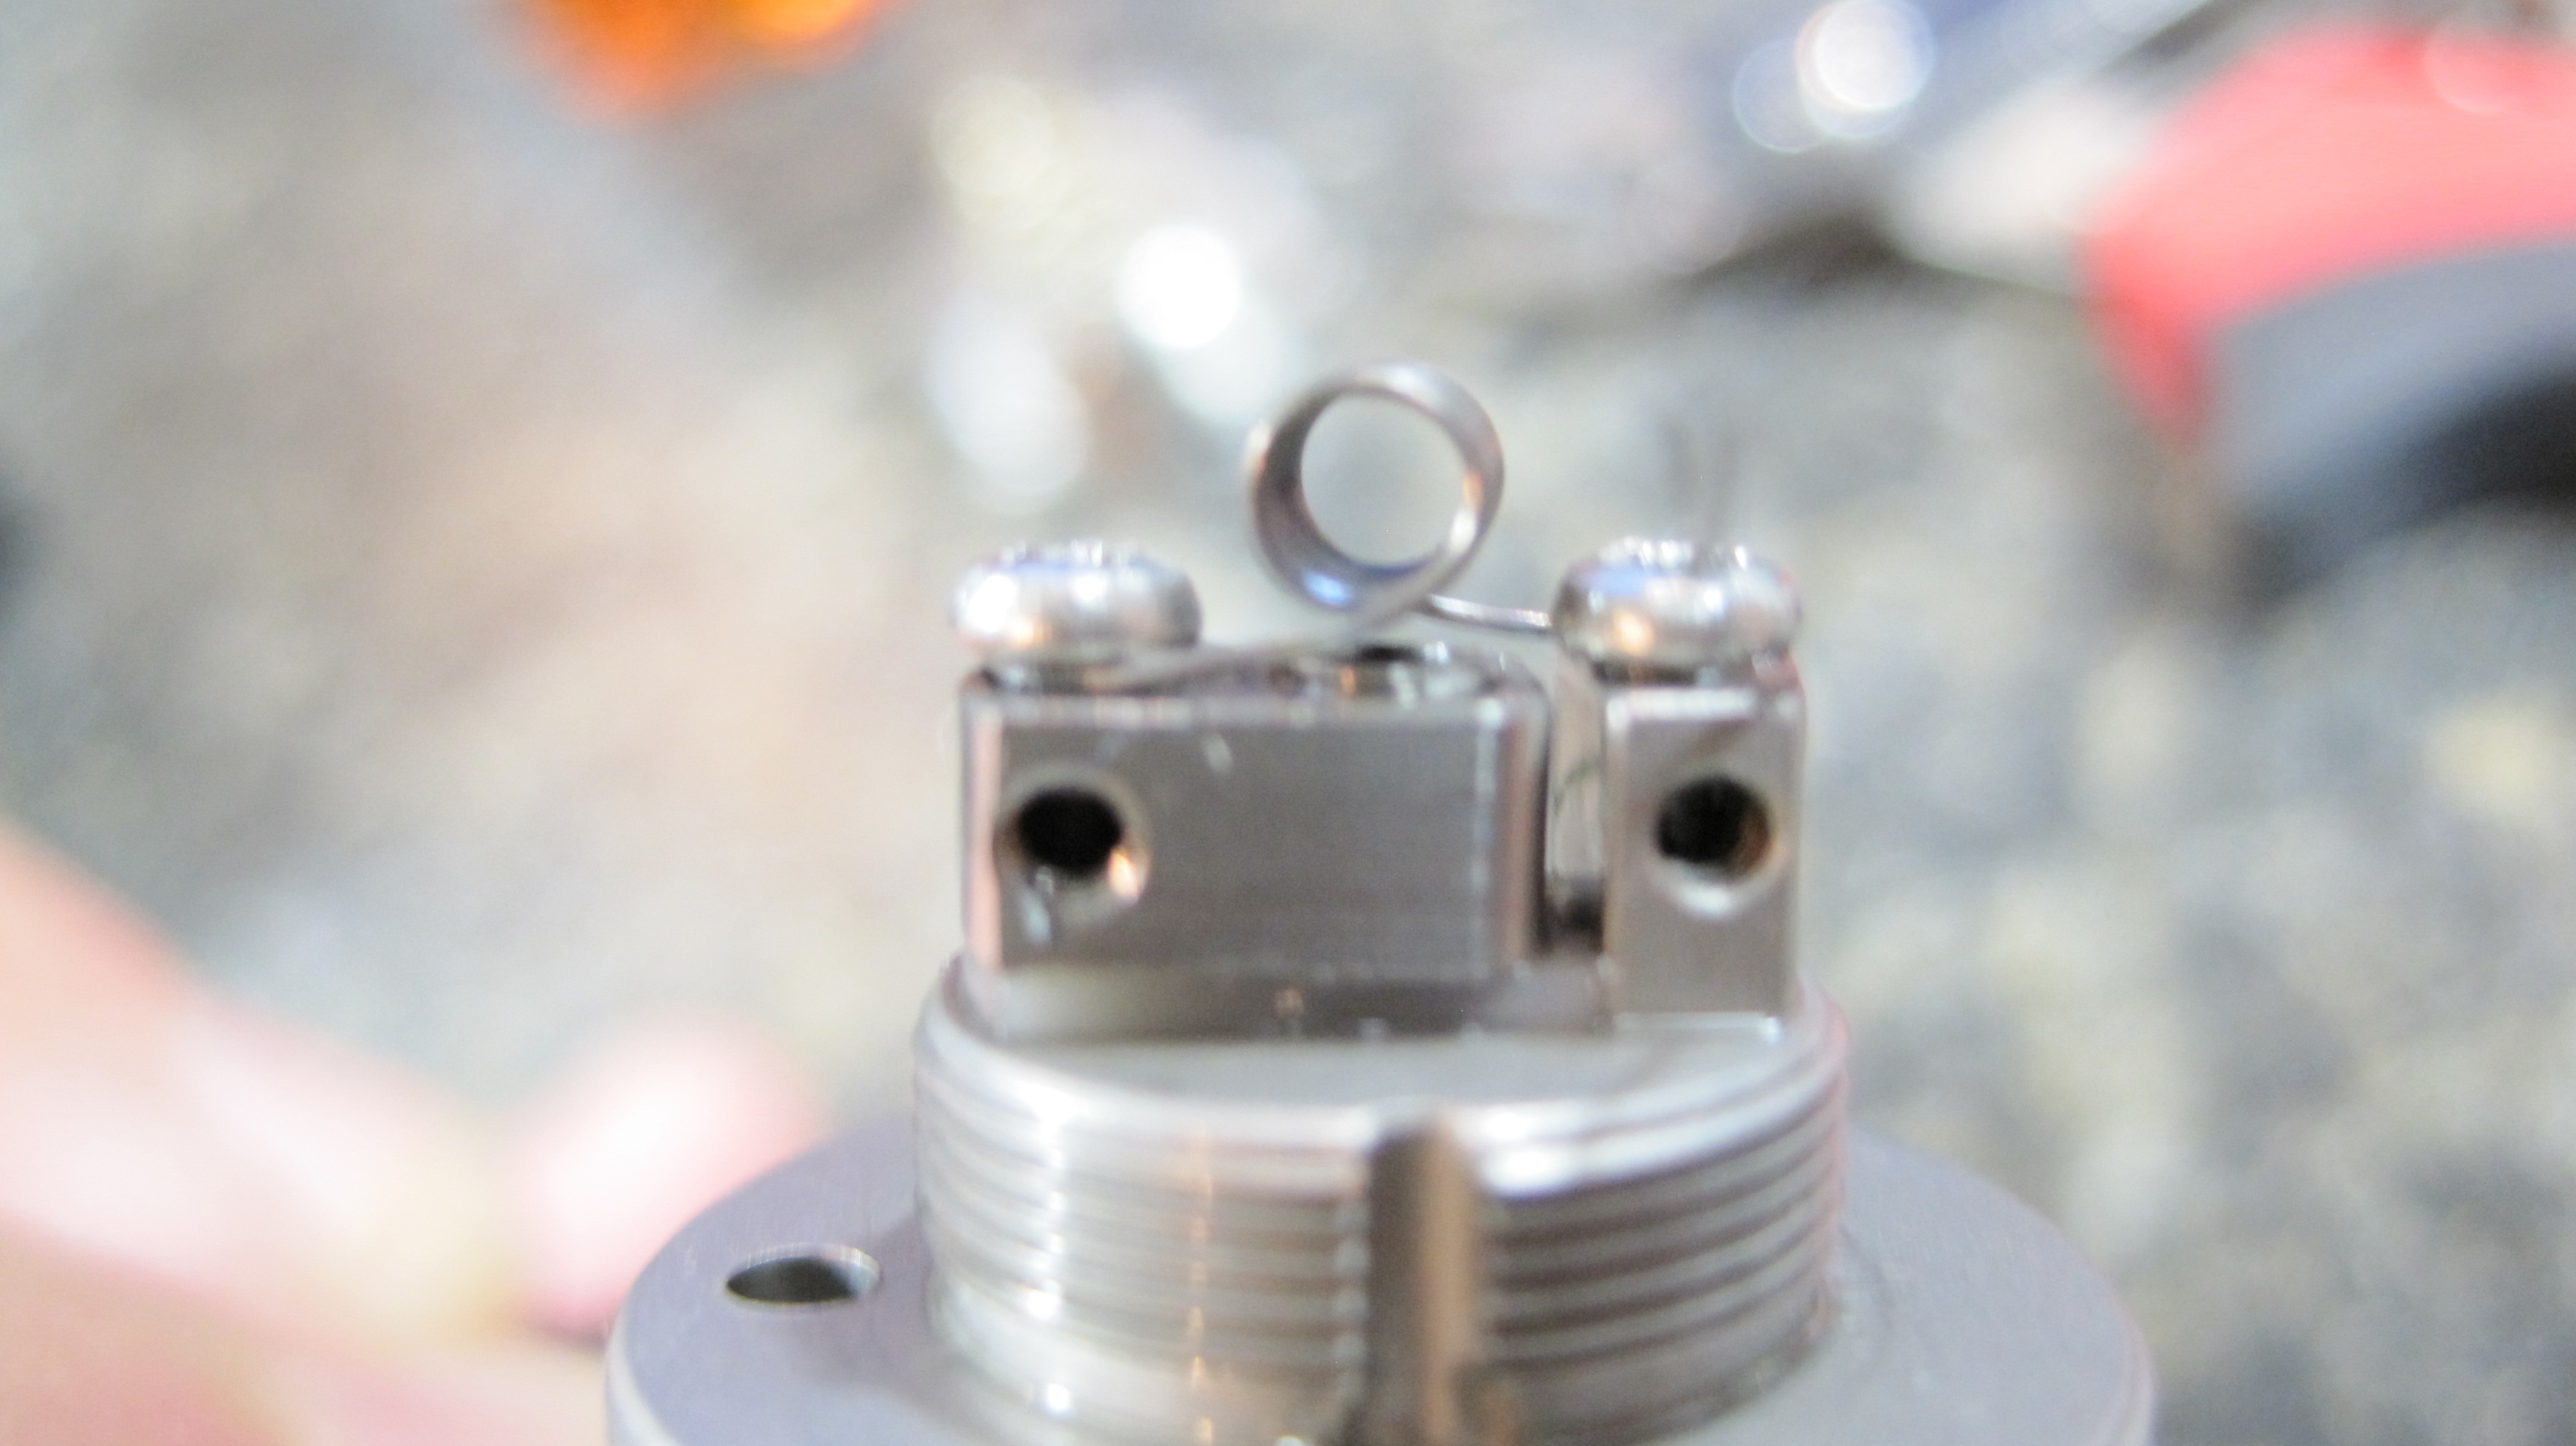
A Micro Coil! A few less wraps getting me to 1.2 Ohms and the Organic Cotton Hemp Wick.
(not quite as tight as I’d like it, I know you guys are looking at that last wrap 🙂 )
To my surprise it honestly worked better than the “spread coil”.
I’m very impressed with the performance, flavor, and vapor this method of coiling is producing. Not to mention the ease of creating and installing this coil. I’m now a true believer.
As I mentioned in the Micro Coil vid, what I was after is a long lasting build that I didn’t have to recoil. You simply remove the old wick, perhaps rinse the coil off, do some dry burning, and install a new wick. Increased flavor, vapor, and throat hit are wonderful fringe benefits.
My compliments to all the people involved in the creation and spreading of this method of building.
Special shout to Pete54! Thanks for that email and tips… and to everyone else who sent their ideas and comments along!
That’s it for now folks. Hope to see many of you in California!
Happy coiling everyone!
THE SMOKTECH RDA & AND MY FIRST GO AT MICRO COILS
A PBusardo Review – Smoktech RDA & Micro Coils!
In this video we talk about the Smoktech RDA and I have my first go at “Micro Coils” using an organic cotton ball wick.
Post Review Follow-up::
- 9/14/13 – Based on the YouTube comments, the biggest blunder in this video was an omission of the following step. The coils need to be held together with tweezers or a needle nose then fired or torched so they maintain the tight coil. Thanks to everyone who posted that and all the other tips!
- 9/14/13 – This was called the “Mini” RDA in the video. I now believe it’s the just the RDA, not the mini. The correct price on the MyVaporStore website is $9.25.
The Links:
My Vapor Store
Zulfiqar’s YouTube Channel
RiP Tripper’s YouTube Channel
The Video:
The Photos:
CLEANING THE TAIFUN GT
A PBusardo Video – Cleaning the Taifun GT
I was going to do this anyway so I decided to roll the camera!
BTW – I said in the video it was a 4 wrap, I think it’s more like 6. Wanna call it a micro-coil? Ok… it’s a micro-coil 🙂
The Links:
SmokerStore
The Video:
The Original Taifun Review :
The Photos:
ALL ABOUT THE KANGER EVOD
A PBusardo Review – All About The EVOD – Includes Recoiling
All about the EVOD… performance, removing the top wick, filling, changing the head, and recoiling.
The Links:
Stormy’s Vapor Cellar
My Vapor Store
The Video:
The Photos:
SETTING UP YOUR GENESIS ATOMIZER
In this video, I take a look at three different methods for building your wick and coil assemblies and share some of my Genesis experiences to date including some of my experience in materials, gauges, meshes, and the difference between building on a wick/coil on a mech vs. a regulated device. Note that although this video was created for the AGA-T(s), the methods can be applied to most Genesis atomizers.
My apologies for the “action” being a little off camera during some of this video. I’m working on a better method to balance my focus on the task at hand AS WELL AS keeping the action on-cam.
IMPORTANT! The Pulse method shown in this video is not exactly the safest method out there. You’re starting off with a damn near short which could be detrimental to your battery and has the potential to lead to venting. A couple tips I’ve heard, 1) Don’t use a fully charged batter, let it drain to around 3.7 volts. 2) You may want to clean or torch your mesh before rolling it to get rid of any harmful contaminants. Use these methods, like any electric cigarette device at your own risk!!
Let’s be clear, am I the best at this? No. But I continue to build my Genesis knowledge and share it with you to the best of my ability.
I pulled some information/suggestions from this video that you may want to see at a glance. Remember, these are the numbers I enjoy and may not be for everyone, not will everyone agree, and that’s ok!
- Lower the wire gauge = thicker the wire = lower resistance over a given piece of wire.
- Higher the wire gauge = thinner the wire = higher resistance over a given piece or wire.
- On a mechanical device: 28 gauge, 3 or 4 wraps, around a 1 Ohm coil.
- On a regulated device: 32 gauge, 4 or 5 wraps, around a 1.5 Ohm coil.
- Try lower density mesh (Ex: 200, 270, 325) for thicker e-liquids.
- Try higher density mesh (Ex: 400, 500, 635) for thinner e-liquids.
Those suggestions could certainly change as I learn and grow more with mechs.
The Video:
Post-Review Follow-Up:
I created a resistance wire calculator for myself and it’s been working pretty good so I decided to pretty it up a bit and share it with you guys.
It available to download by clicking HERE. Excel is required.
- Enter the target resistance of the coil you’re trying to make in the first field.
- Use the pull down in the second field to select the coil type (currently supports single, dual, and triple
- Use the pull down in the third field to select the Kanthal gauge (currently supports 28, 32, & 34 – metric also display)
- The wire length in inches, cm, and the number of wires required will be calculated for you.
Note that the calculations are based detailed resistance measurements of A-1 Kanthal I purchased from Temco on Ebay. Depending on what your using, you may need to modify the calculations a bit.
The Photos
SOME CARTO PUNCHES AND WORKING WITH CARTO TANKS
A PBusardo Review & Tutorial – QT-1 (not really a) carto punch and Working with carto tanks
This is a LONG video, but I wanted it to be your one-stop guide for help in working with carto tanks. This video shows two different carto punches, how to punch your carto, how to prime your carto (and what could happen when you don’t), how to get your carto in the tank, and how to fill the tank
It also contains a troubleshooting guide to diagnose and cure some common carto tank issues.
I hope you find it helpful!
The Links:
Kir Fanis punch @ AvidVaper
Kir Fanis punch @ GR-Modders
QT-1 Tap (Punch) @ Amazon
The Video:
The Photos
WHAT YOU GOT PETAR?
As I continue my journey into the world of the Genesis Style atty, I decided to try the Petar K method tonight with the Z-Atty Pro.
I had my doubts about this method. My biggest concern was with the coil making proper contact with the wick and therefore the juice.
I’m one of those guys who doesn’t believe anything until I try it for myself.
The results? I’m really happy.
Click on the little “i” in the upper right of the gallery to see my comments on the photos.
Thanks to everyone for all the helpful tips and tricks and to Petar for this method. Very much appreciated!